Best Non-Gel Milky White Nail Polishes
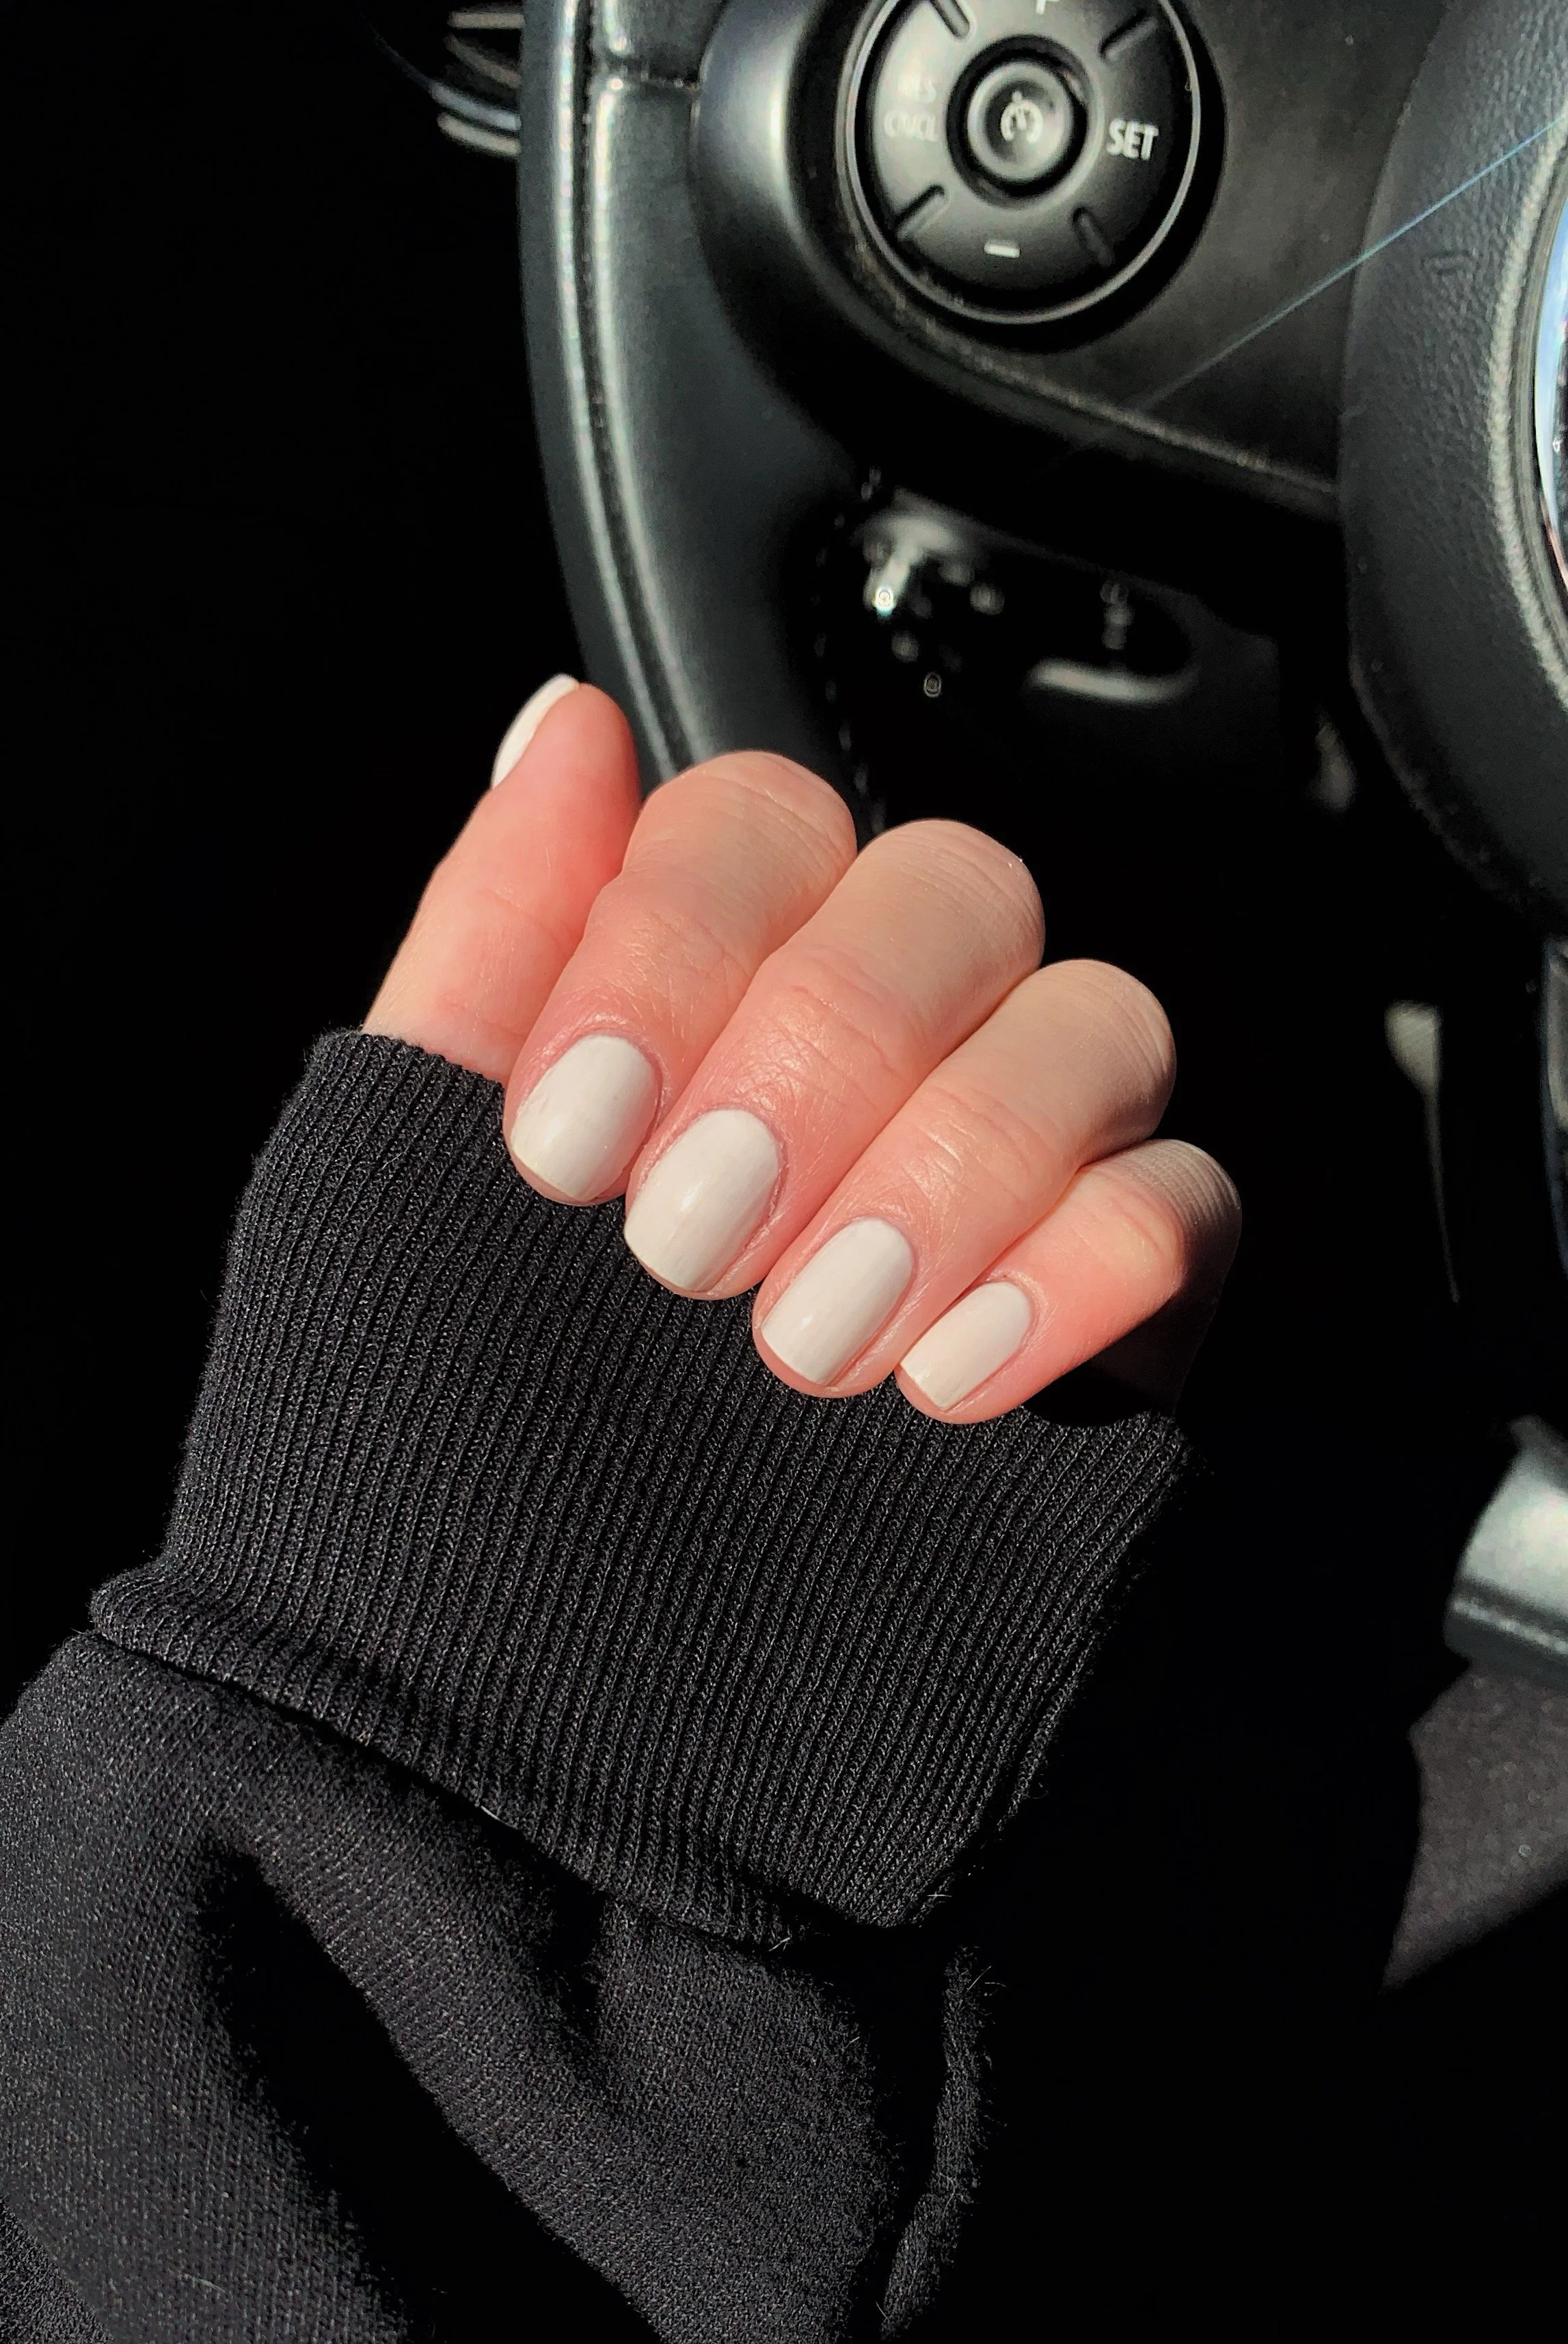
I’m obsessed with milky white nail polishes, but it’s been quite the journey trying to find one that is opaque enough, doesn’t require a million coats, or chip after three days. I’m a traditional nail polish girl through and through, and I prefer to do my nails myself as a self-care ritual rather than make an appointment at the salon. I’m also extremely rough on my nails - washing my hands constantly, dishes daily, working with my hands - and so I need a long-lasting polish that won’t chip the next day.
I’ve been on the hunt for the perfect milky white nail polish for years it seems like, but really narrowed down my search after the last few months. I personally bought and sampled tons of different polishes from the drugstore, Ulta, and indie brands. These are the best of the best (in my opinion) and the personal favorites that I continue to go back to.
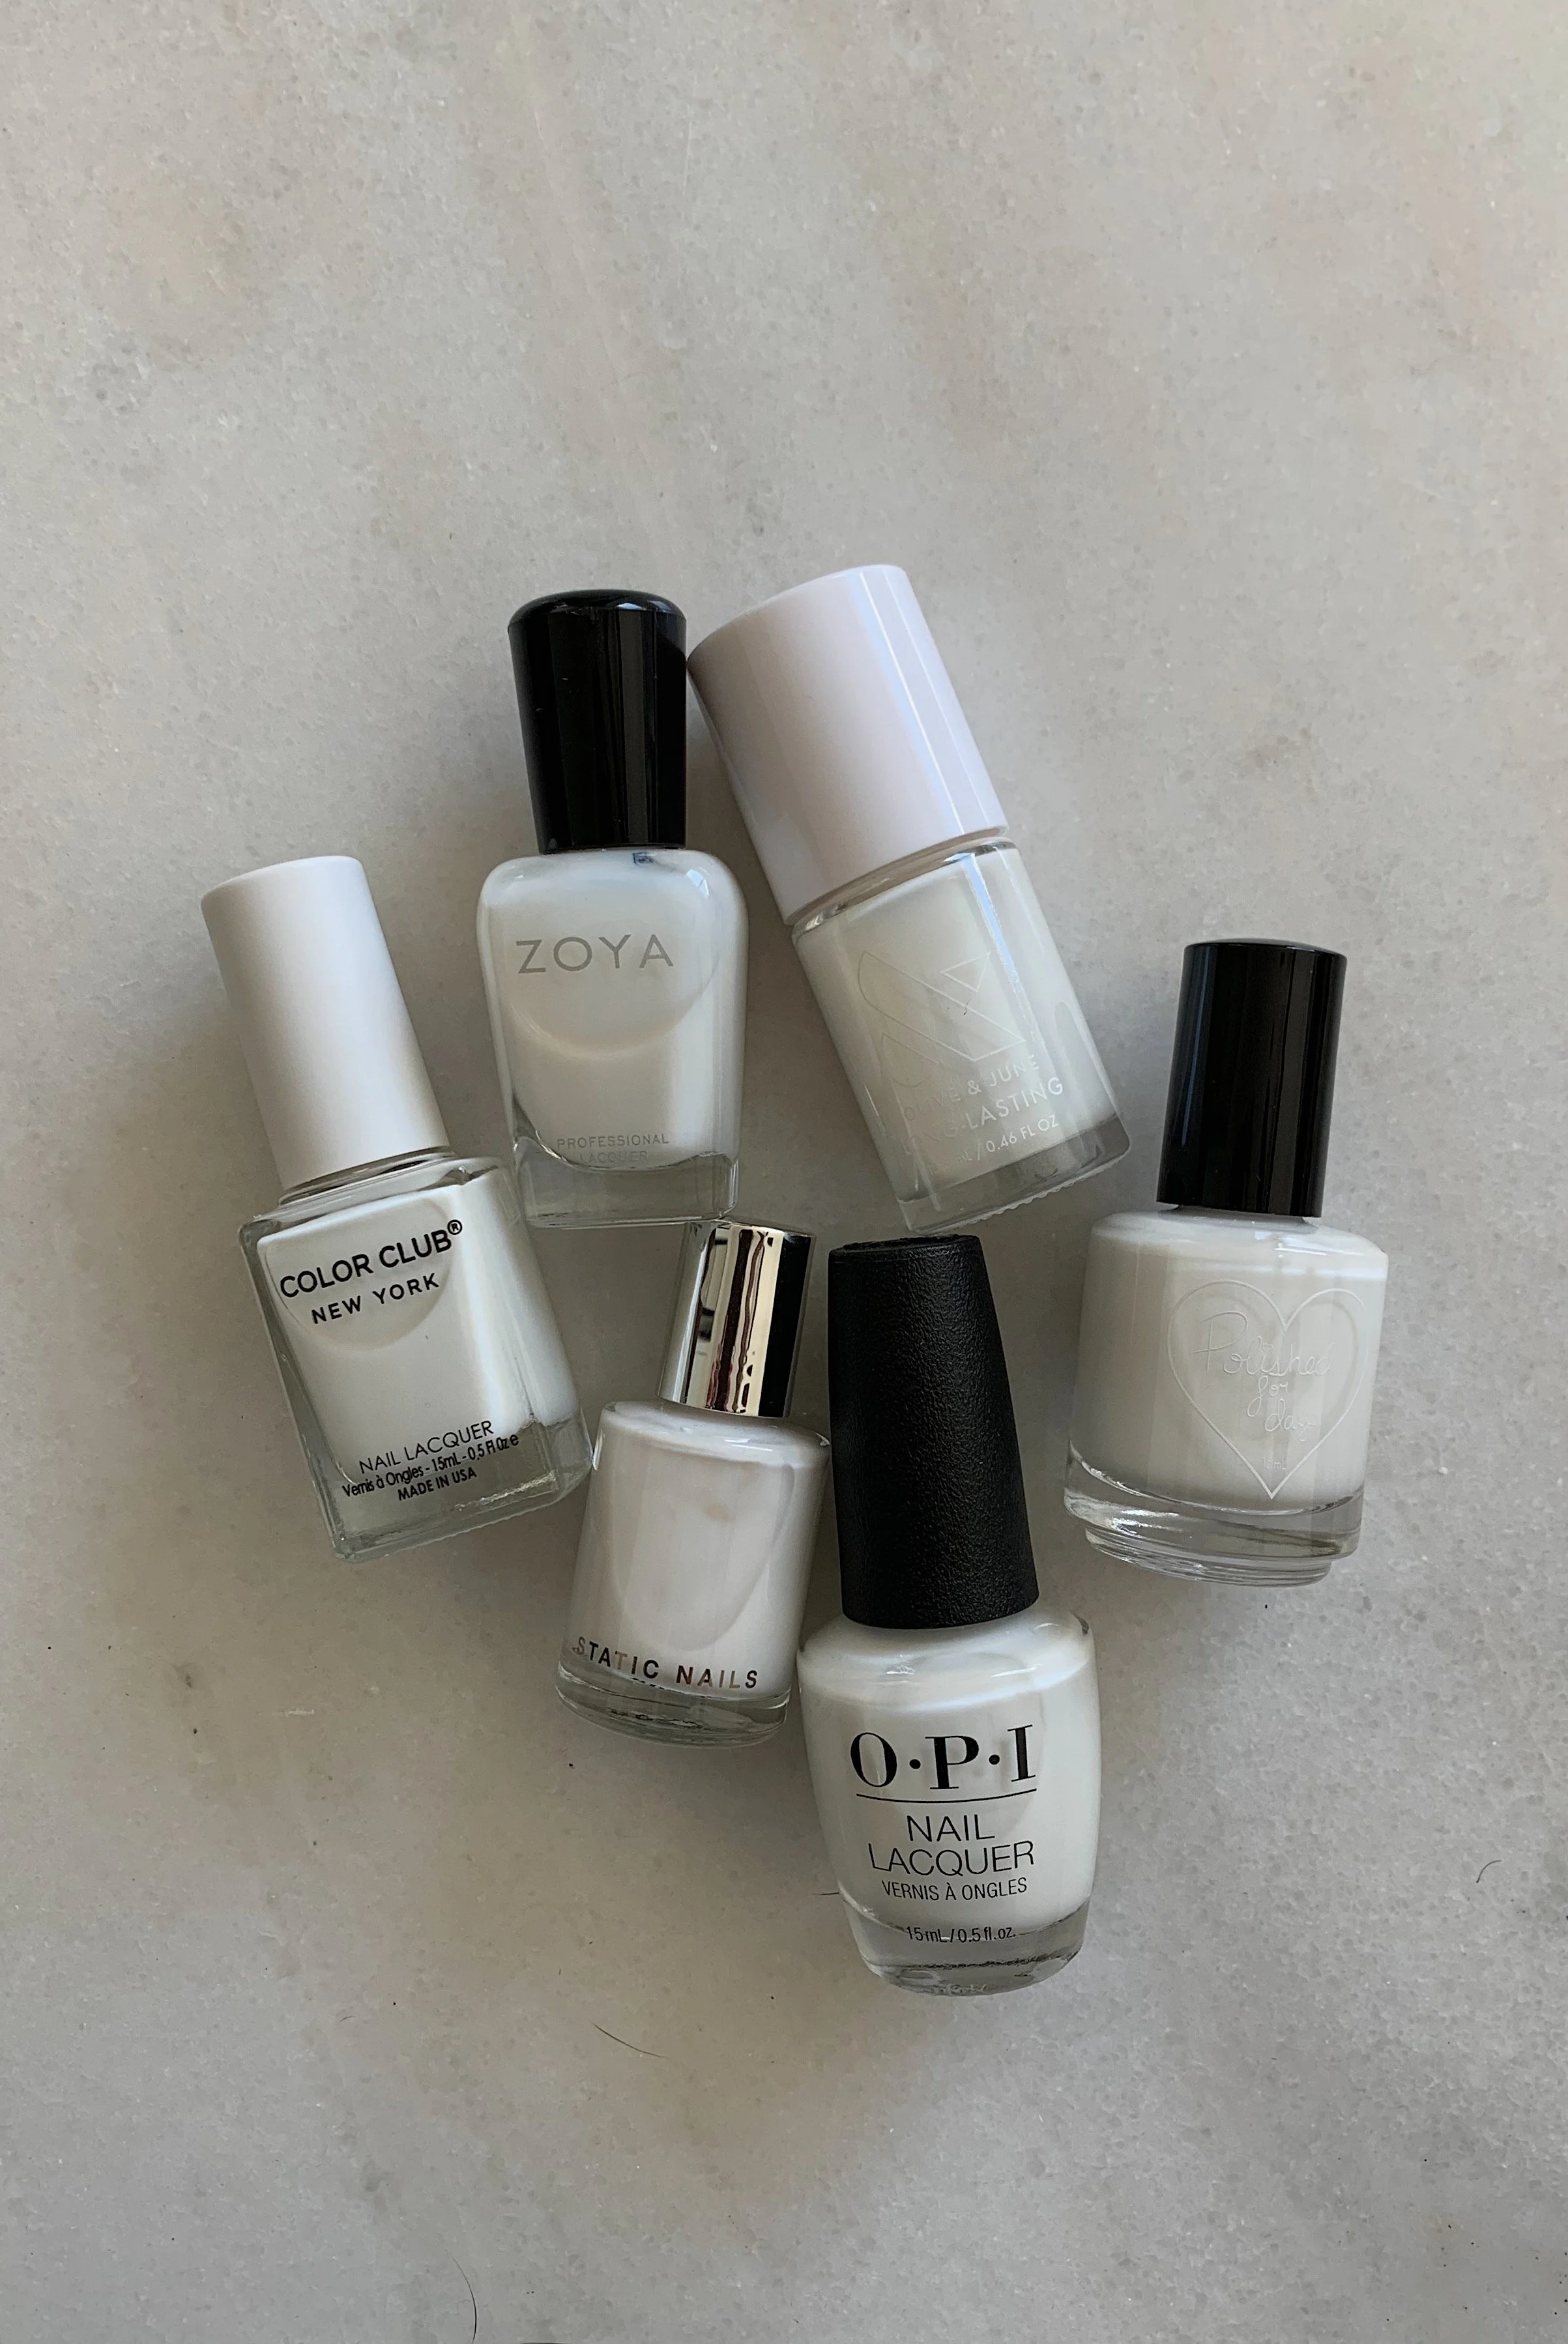
best non-gel milky white nail polishes

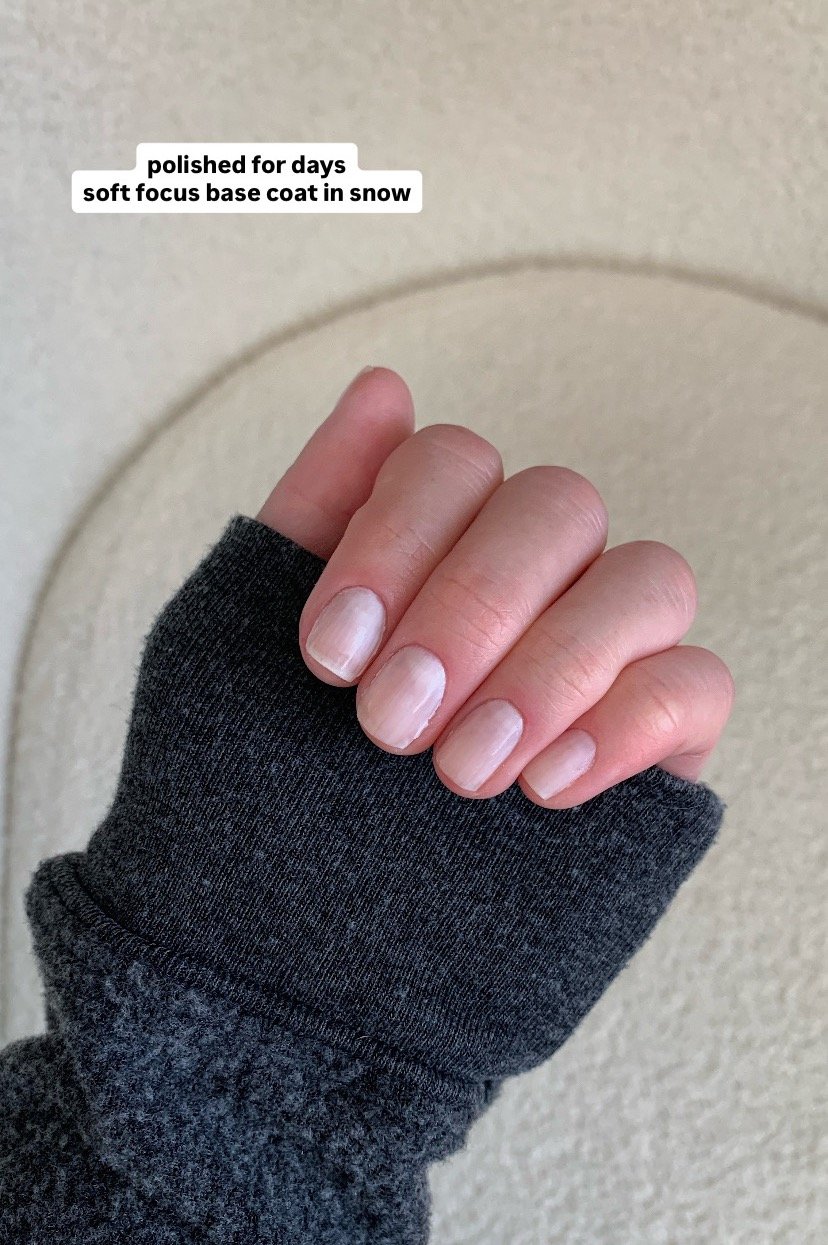
polished for days soft focus basecoat in snow
Disclaimer: Soft Focus is a base coat specifically formulated for white manicures, so it’s not the main event, but it’s truly worth buying. I hate how sheer and streaky milky white nail polishes can sometimes look, and this base coat completely eliminates that. The best way I can describe it is that it’s a crumb coat. It applies thin and your nails still look a little streaky after it dries, but it makes your main nail polish look SO good. I’ve applied all of the nail polishes mentioned below on their own, and they need an extra coat if I don’t use Soft Focus - but I prefer Soft Focus because it’s more lightweight on your nails, so it’s going to make your manicure last longer, reduce chipping, and elevate your nail polish a bit because your manicure will look effortless, rather than heavy and thick.
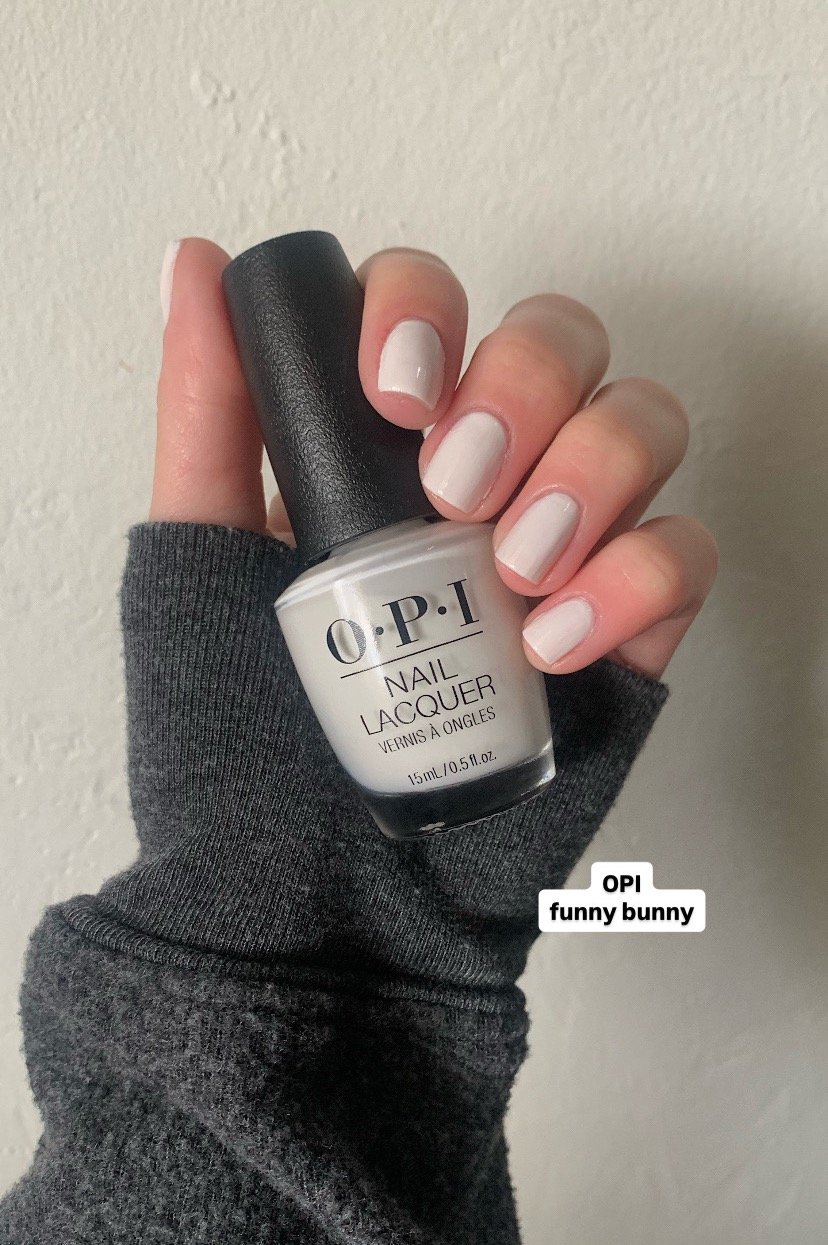
OPI funny bunny
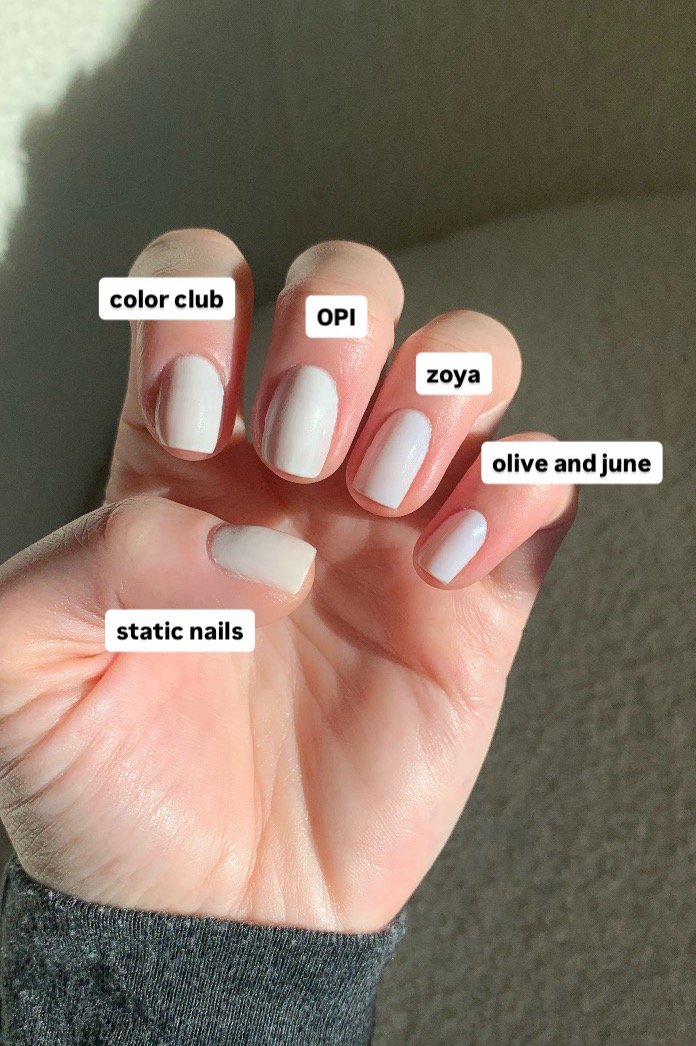
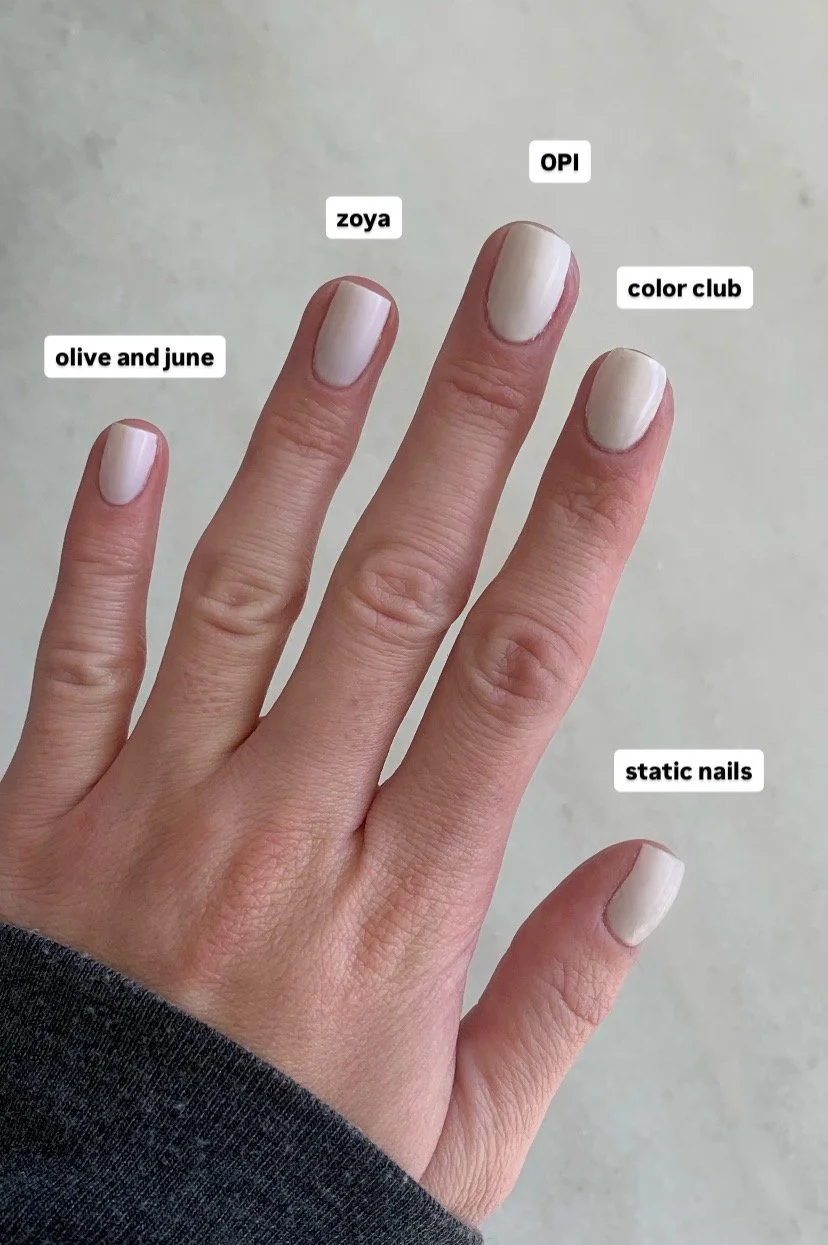
All the gel girlies swear by Funny Bunny, but I’ve always been hesitant to try the traditional formula. That being said, I was pleasantly surprised by it. It’s a great true milky white - not too pink, creamy, or icy - but it takes a full 3 coats to be opaque and can be streaky if you don’t use a base coat or buff the ridges of your nails first. Ultimately, this was the truest milky white out of all the formulas I tested, and it ended up being my favorite. It lasted the longest without chipping, which also helped distinguish it as the best formula. If you’ve tried lots of Essie polishes but struggled with the sheerness (especially Marshmallow shade), try Funny Bunny; it really does what Essie polishes try to do... Coke vs Shasta, if you will.
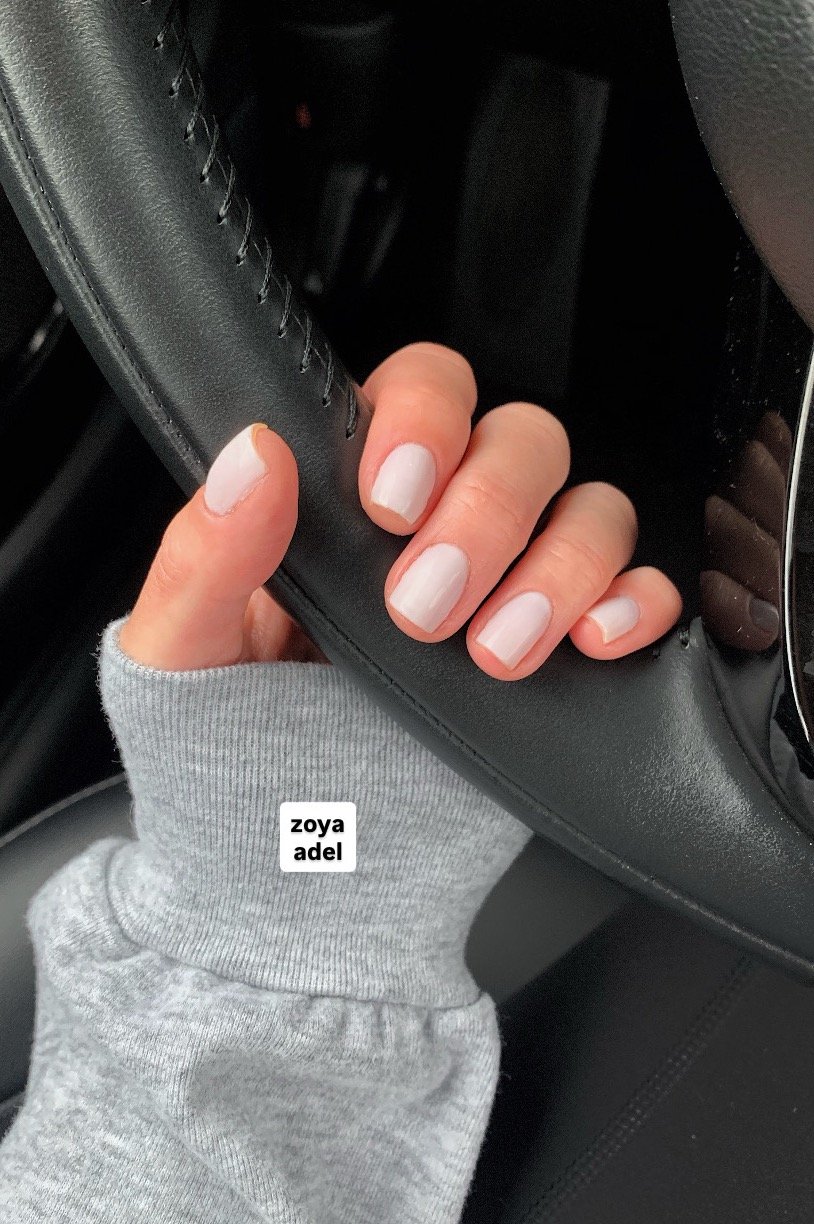
zoya adel
Zoya is one of my favorite vegan nail polish brands; they also prioritize clean ingredients and their polishes are free of TPO/ 10 harmful chemicals. Adel is a sheer cream; it’s milky white, but has pink undertones. The polish is on the thinner, more sheer side, which makes it easier to layer multiple coats but can also increase the drying time needed. I find it takes 3 coats to reach a semi-opaque opacity with the Snow base coat, or 4-5 without. The brush is also quite thin; I’m not one for a thick brush, but this is thin even by my standards, yet it still applies easily. However, out of all the family and friends I polled, this was the favorite - it would’ve been ranked #1 but the pinkish undertones made me knock it down one since this post is technically focused on milky white polishes and not everyone wants that warm undertone.
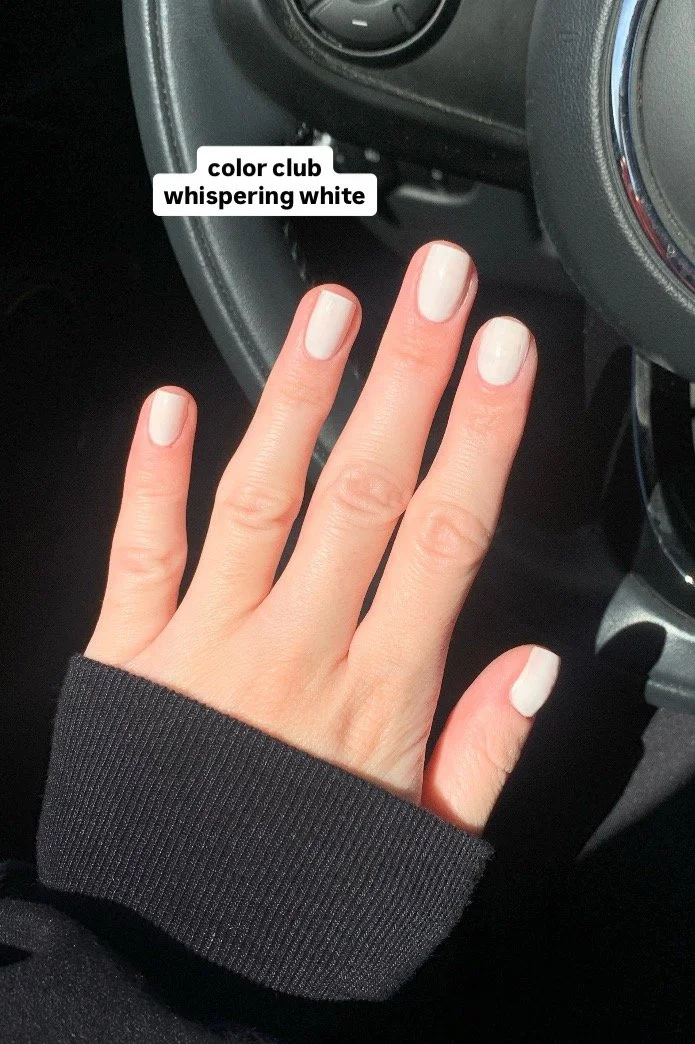
color club whispering white
Whispering White had been recommended to me for a while, but the website is so bare bones (no sample photos or reviews) that I was hesitant to order. That being said, I wish I tried it sooner because it’s a great milky white nail polish. It’s a semi-sheer formula, so it’s going to look a little creamer than a traditional white polish, but there aren’t any pink undertones. If you want a bright manicure but don’t want the dreaded “wite-out” nails, this polish will be your new fave. I find it’s opaque after 2 coats (or 3 really thin coats).
PS: if you go to open the bottle and the brush isn’t connected, just screw it back on tightly, then open it again (grabbing towards the bottom of the handle) and it should be fine.
static nails quiet luxury
Static Nails has quickly become one of my favorite non-toxic nail polish brands. Quiet Luxury is a semi-sheer pinky-white nail polish. It’s the warmest out of all the polishes I’ve mentioned, but still has that white base that pops. I prefer its formula much more than their other milky white polish Coco, which is meant to be more opaque, but is so streaky and needs a full 3-4 coats to look good. As far as Quiet Luxury goes, you can get away with 2 coats if you use the Snow base coat; if not, 3 is ideal.
olive and june icing is the best part
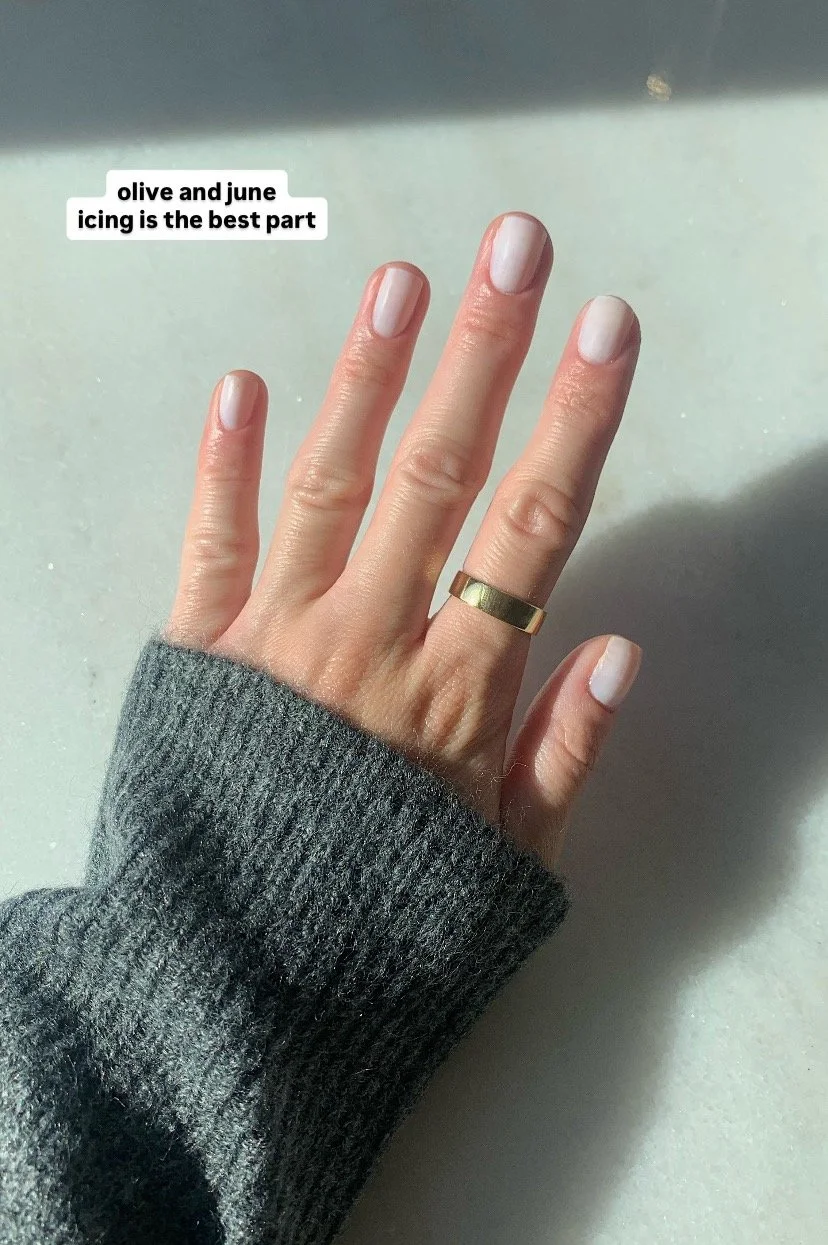
Icing is the Best Part is a brighter milky white polish, but with a twist. It has a little bit of a purple iridescent shift in it; the best way to describe it is that it looks like those stamps you used to get on your hand that glow purple in black light. I don’t love glitter or shimmer, so that’s why this polish isn’t ranked higher, but I really do love how they managed to make a milky white polish that’s still bright and pops. It’s somewhat sheer, so I recommend 2-3 coats, but you don’t need a base coat for this polish to look good. If you are in a rush or want the least amount of coats, I’d go with this polish or Funny Bunny. Olive and June also makes a gel version of this polish, so make sure you get the traditional version. Bonus: it’s one of the cleaner nail polishes, free of 15 “bad” ingredients.
how to do milky white nails at home
As I mentioned in the intro, I have been doing my nails at home for years and aim to do them once a week, although with my tips and tricks you can easily extend it to two weeks (or more, if you aren’t as rough on your hands as I am). Most at-home kits are gimmicky; these are the tools that I actually swear by and the steps I follow every time I do my nails at home.
prep your cuticles
I highly recommend using Olive and June Cuticle Remover to prep your cuticles. It sounds painful/ drying, but it’s actually a watery liquid (not drying at all, but also not super creamy or oily) that helps moisturize your cuticles and the excess cuticle kind of flakes off. You apply a drop or two to your nails and let it soak for around 10 minutes; then you push your cuticles back (I love this $4 metal cuticle pusher more than the wood ones, but be gentle as the flat side is a little sharp). I do one hand at a time for this; it’s too messy doing both at once.
As far as cutting cuticles goes, that really is personal preference. I do it because I’m horrible about picking. The cuticle balm softens them up enough that I can lightly trim them, but it’s unnecessary and I don’t recommend it if you’re going to cause injury to yourself. If you want to try to cut them yourself, I use these cuticle scissors. They’re super sharp when you first get them, so be extra careful.
file your nails
You can leave the remaining cuticle balm on your nails (it’s moisturizing) or wipe it off before filing. I like these nail files; there’s a textured side for more intense filing, but I just use the softer side. I file my nails instead of cut them because I never let them get that long, but you can use nail clippers at this step, too.
I file my nails straight across for the most point, but will sometimes round the edges. Some say to only file in one direction (versus going back and forth), but that takes too much time for me and I haven’t noticed any difference in the health of my nails between the two styles.
buff your nails
A nail buffer is a must-have when it comes to applying a milky white nail polish because it’s going to smooth out some of the ridges and make your polish apply much more evenly. Use a light hand and don’t worry if there are still some bumps or ridges - you do not need to eliminate them completely and that would probably make your nails too thin, anyways.
use a base coat
Depending on how much time I have for dry time, I’ll use 1-2 base coats to prep my nails. I love this ridge filler by Olive and June; it dries SO fast and is more of a mattifying base than a traditional polish, but it’s not necessary and doesn’t make your nail polish last any longer. I just am really rough on my nails and always have crazy bumps and ridges, so whenever I can, I like to use it.
Another good base coat is this nail strengthener; it’s super strange in that it feels like alcohol/ acetone when it’s applying (not like traditional polish at all) but really does strengthen your nails; mine used to peel and crack like crazy before I started using it. I try to apply it 1x a month now as maintenance.
The most important base coat, though, is the Polished for Days Soft Focus Basecoat in Snow. This helps make your milky white polish more opaque; I consider it the “crumb coat” and it is absolutely worth it. I just do one light coat, and it dries quickly. This typically looks streaky when you apply it, but I swear it makes your next polish apply much more evenly.
I have stacked all three of my base coats before; it doesn’t feel too heavy, but it just takes too much time for me so I alternate the strengthener/ ridge filler every few weeks but the Polished for Days is my non-negotiable when it comes to milky white nails. If you’re going to stack all three, do strengthener, then ridge filler, then Snow (1 thin coat of each).
apply nail polish
Pretty straightforward; I do 2-3 thinner coats, but you know what works best for you. Truth be told, because I am not the most patient about dry times, I will sometimes do two coats of my milky white polish and let it fully dry, then add the third coat the next day. I don’t have to worry about creasing or smudging, and it usually helps my nail polish last a full two weeks. It’s a little extra/ time intensive, but my go-to process if I’m doing my nails for a special event.
finish with a long-lasting top coat
The right top coat is harder to find than you think, because lots of them oxidize or end up changing the color of your milky white nail polish (either leaving a grey cast, or making them look yellow). As far as non-toxic top coats go, this one is my favorite. The shine is unreal, and it really makes my nails pop and look like I just got them done at a salon.
The only reason I like this one a little more is that it speeds up the drying time, but both are great and make your nails look so good.
maintain and extend your manicure
This is the part I am not great at, which is why I end up doing my nails every week. Maintain and extend your manicure by keeping your cuticles and hands moisturized. This cuticle oil is great for overnight or when you’re just hanging out; it is definitely oily so I don’t love it when I’m working on my laptop or using my hands a lot. For desk days, I try to stick to this serum because it absorbs quickly.
Hand cream is also key in extending your manicure. This hand serum is non-greasy, under $10, smells great, is hydrating, and has cleaner ingredients - one of my favorite Target finds of all time. It dries down but hydrates, so it’s my go-to when I still need to use my hands/ don’t have time to sit around and wait for it to absorb. For nighttime or when you don’t mind a little extra hydration, you really cannot beat the L’Occitane hand cream. It’s moisturizing, lightweight yet creamy, and smells so good. I also really like using Gold Bond overnight in the wintertime; it heals cracks and dryness like no other, which is something I really struggle with. It may not be the cutest brand but it works and it’s cheap!