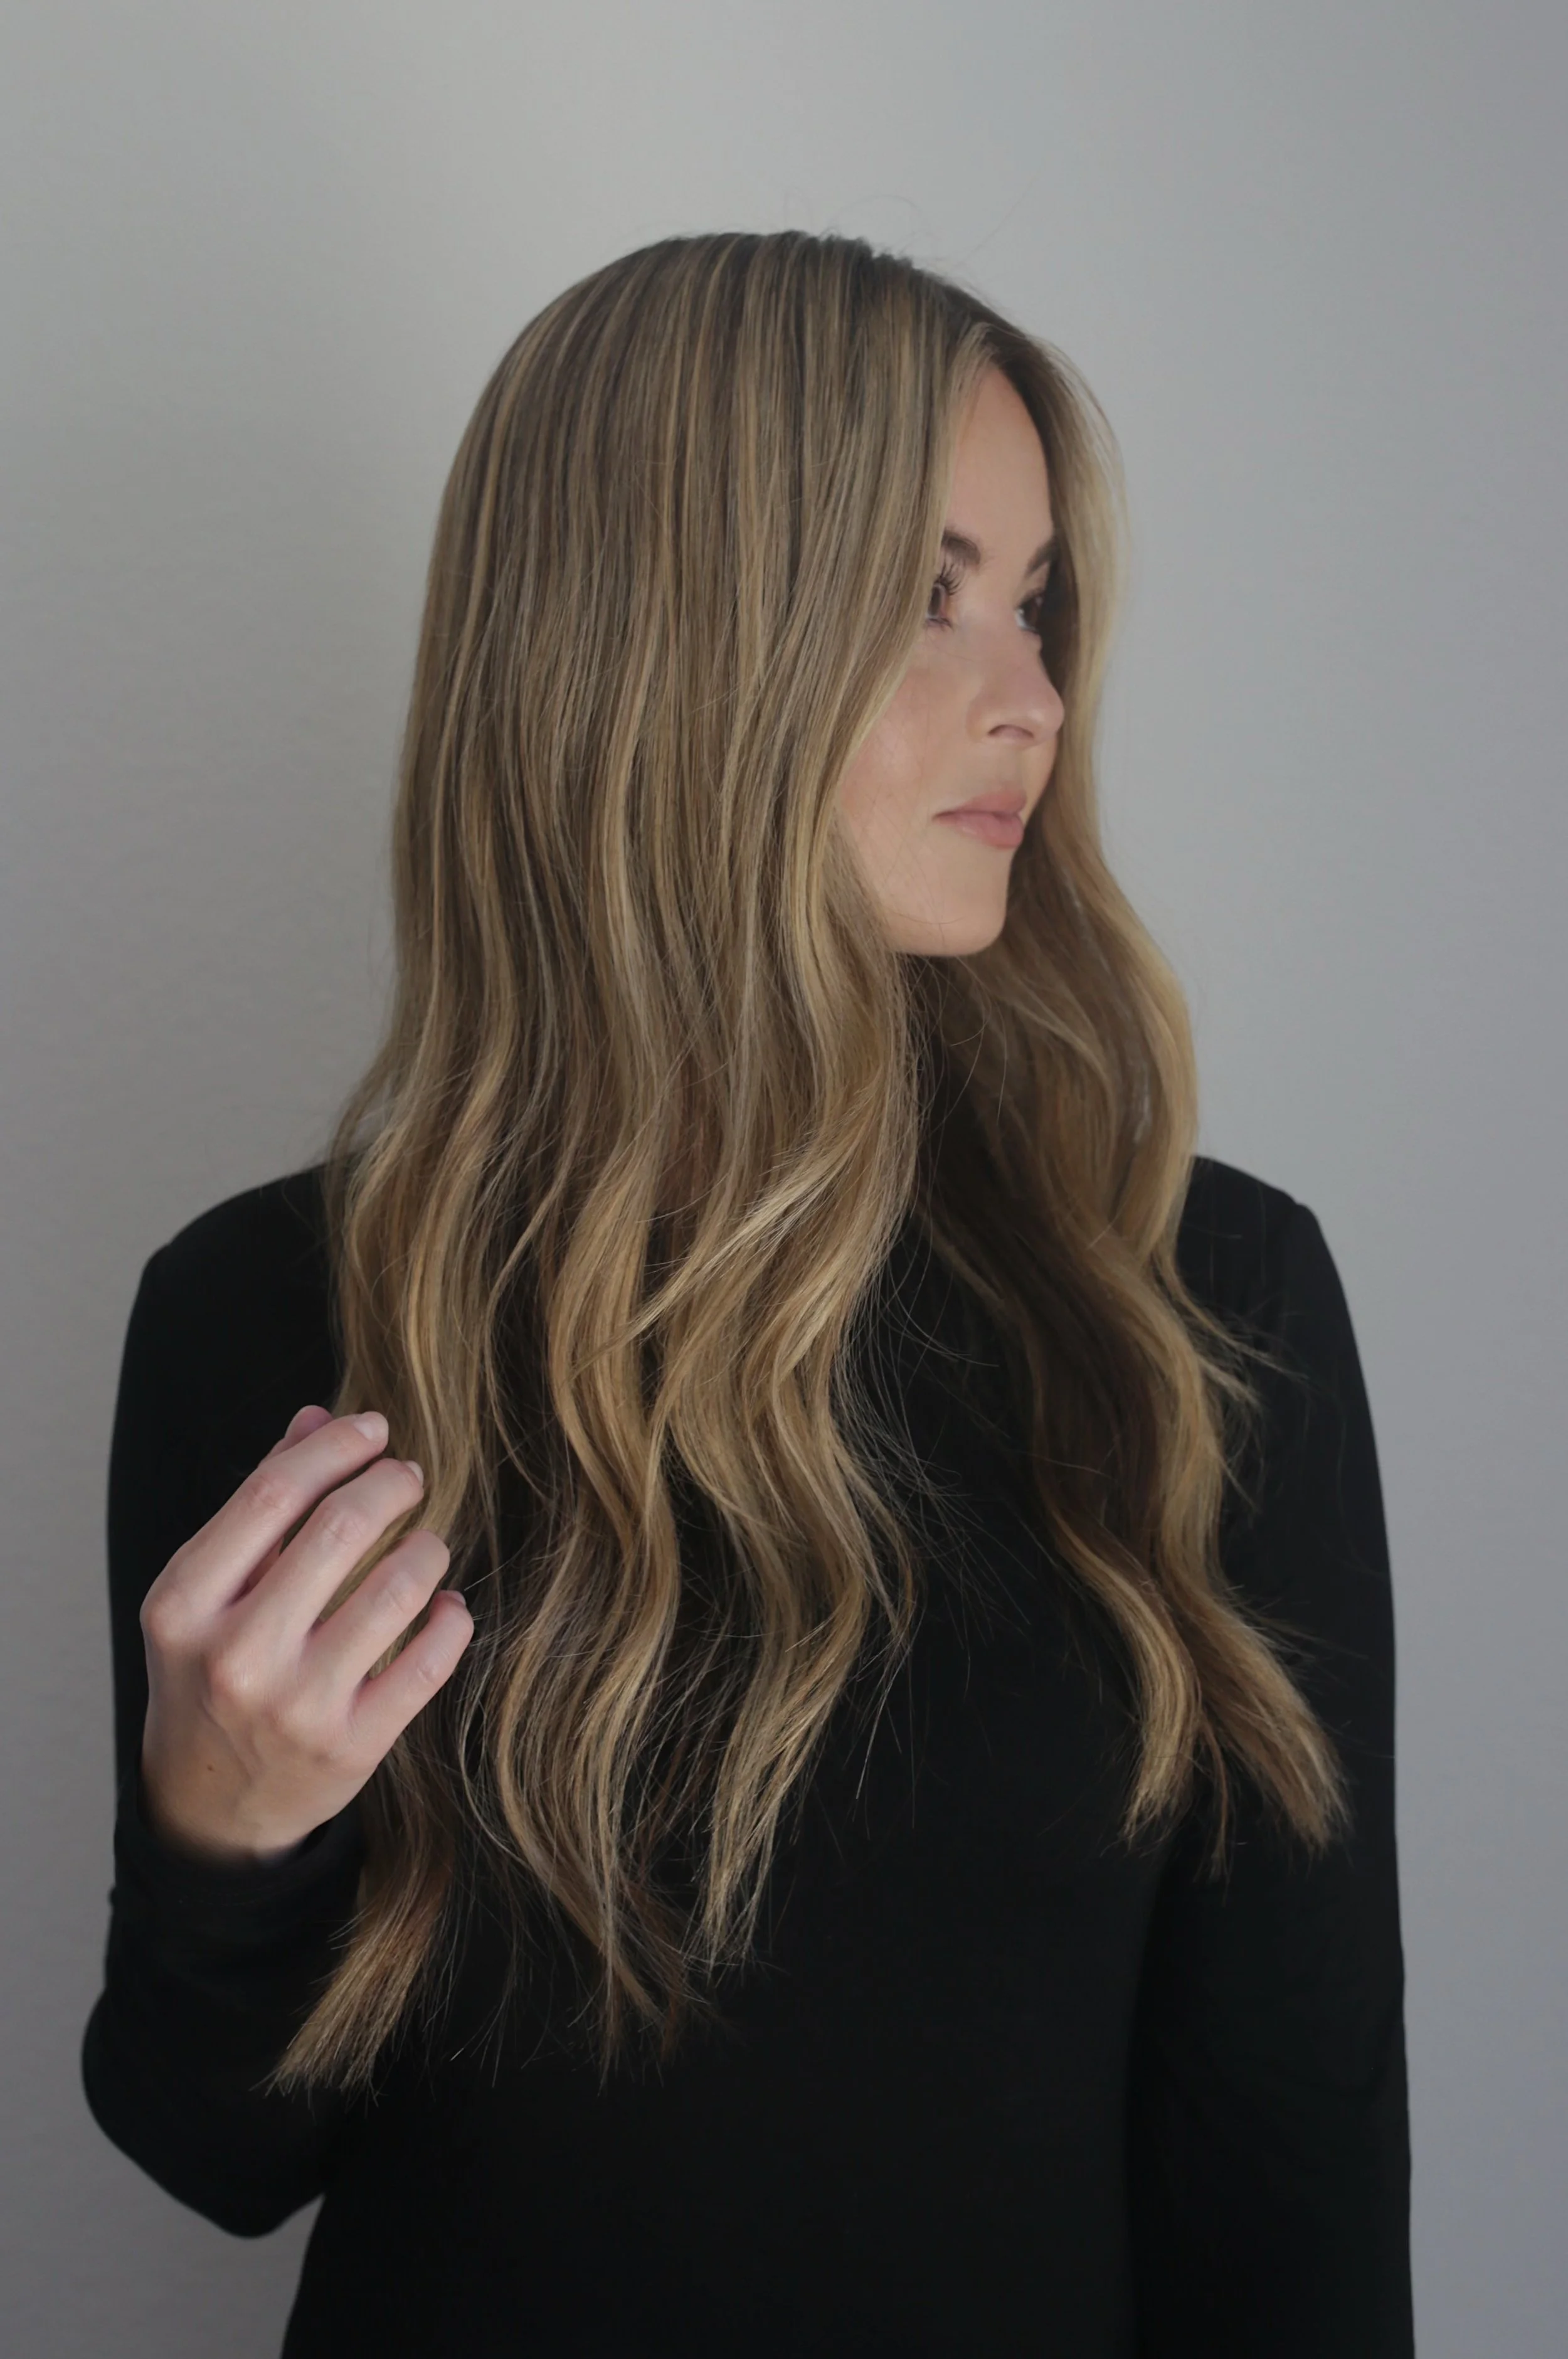
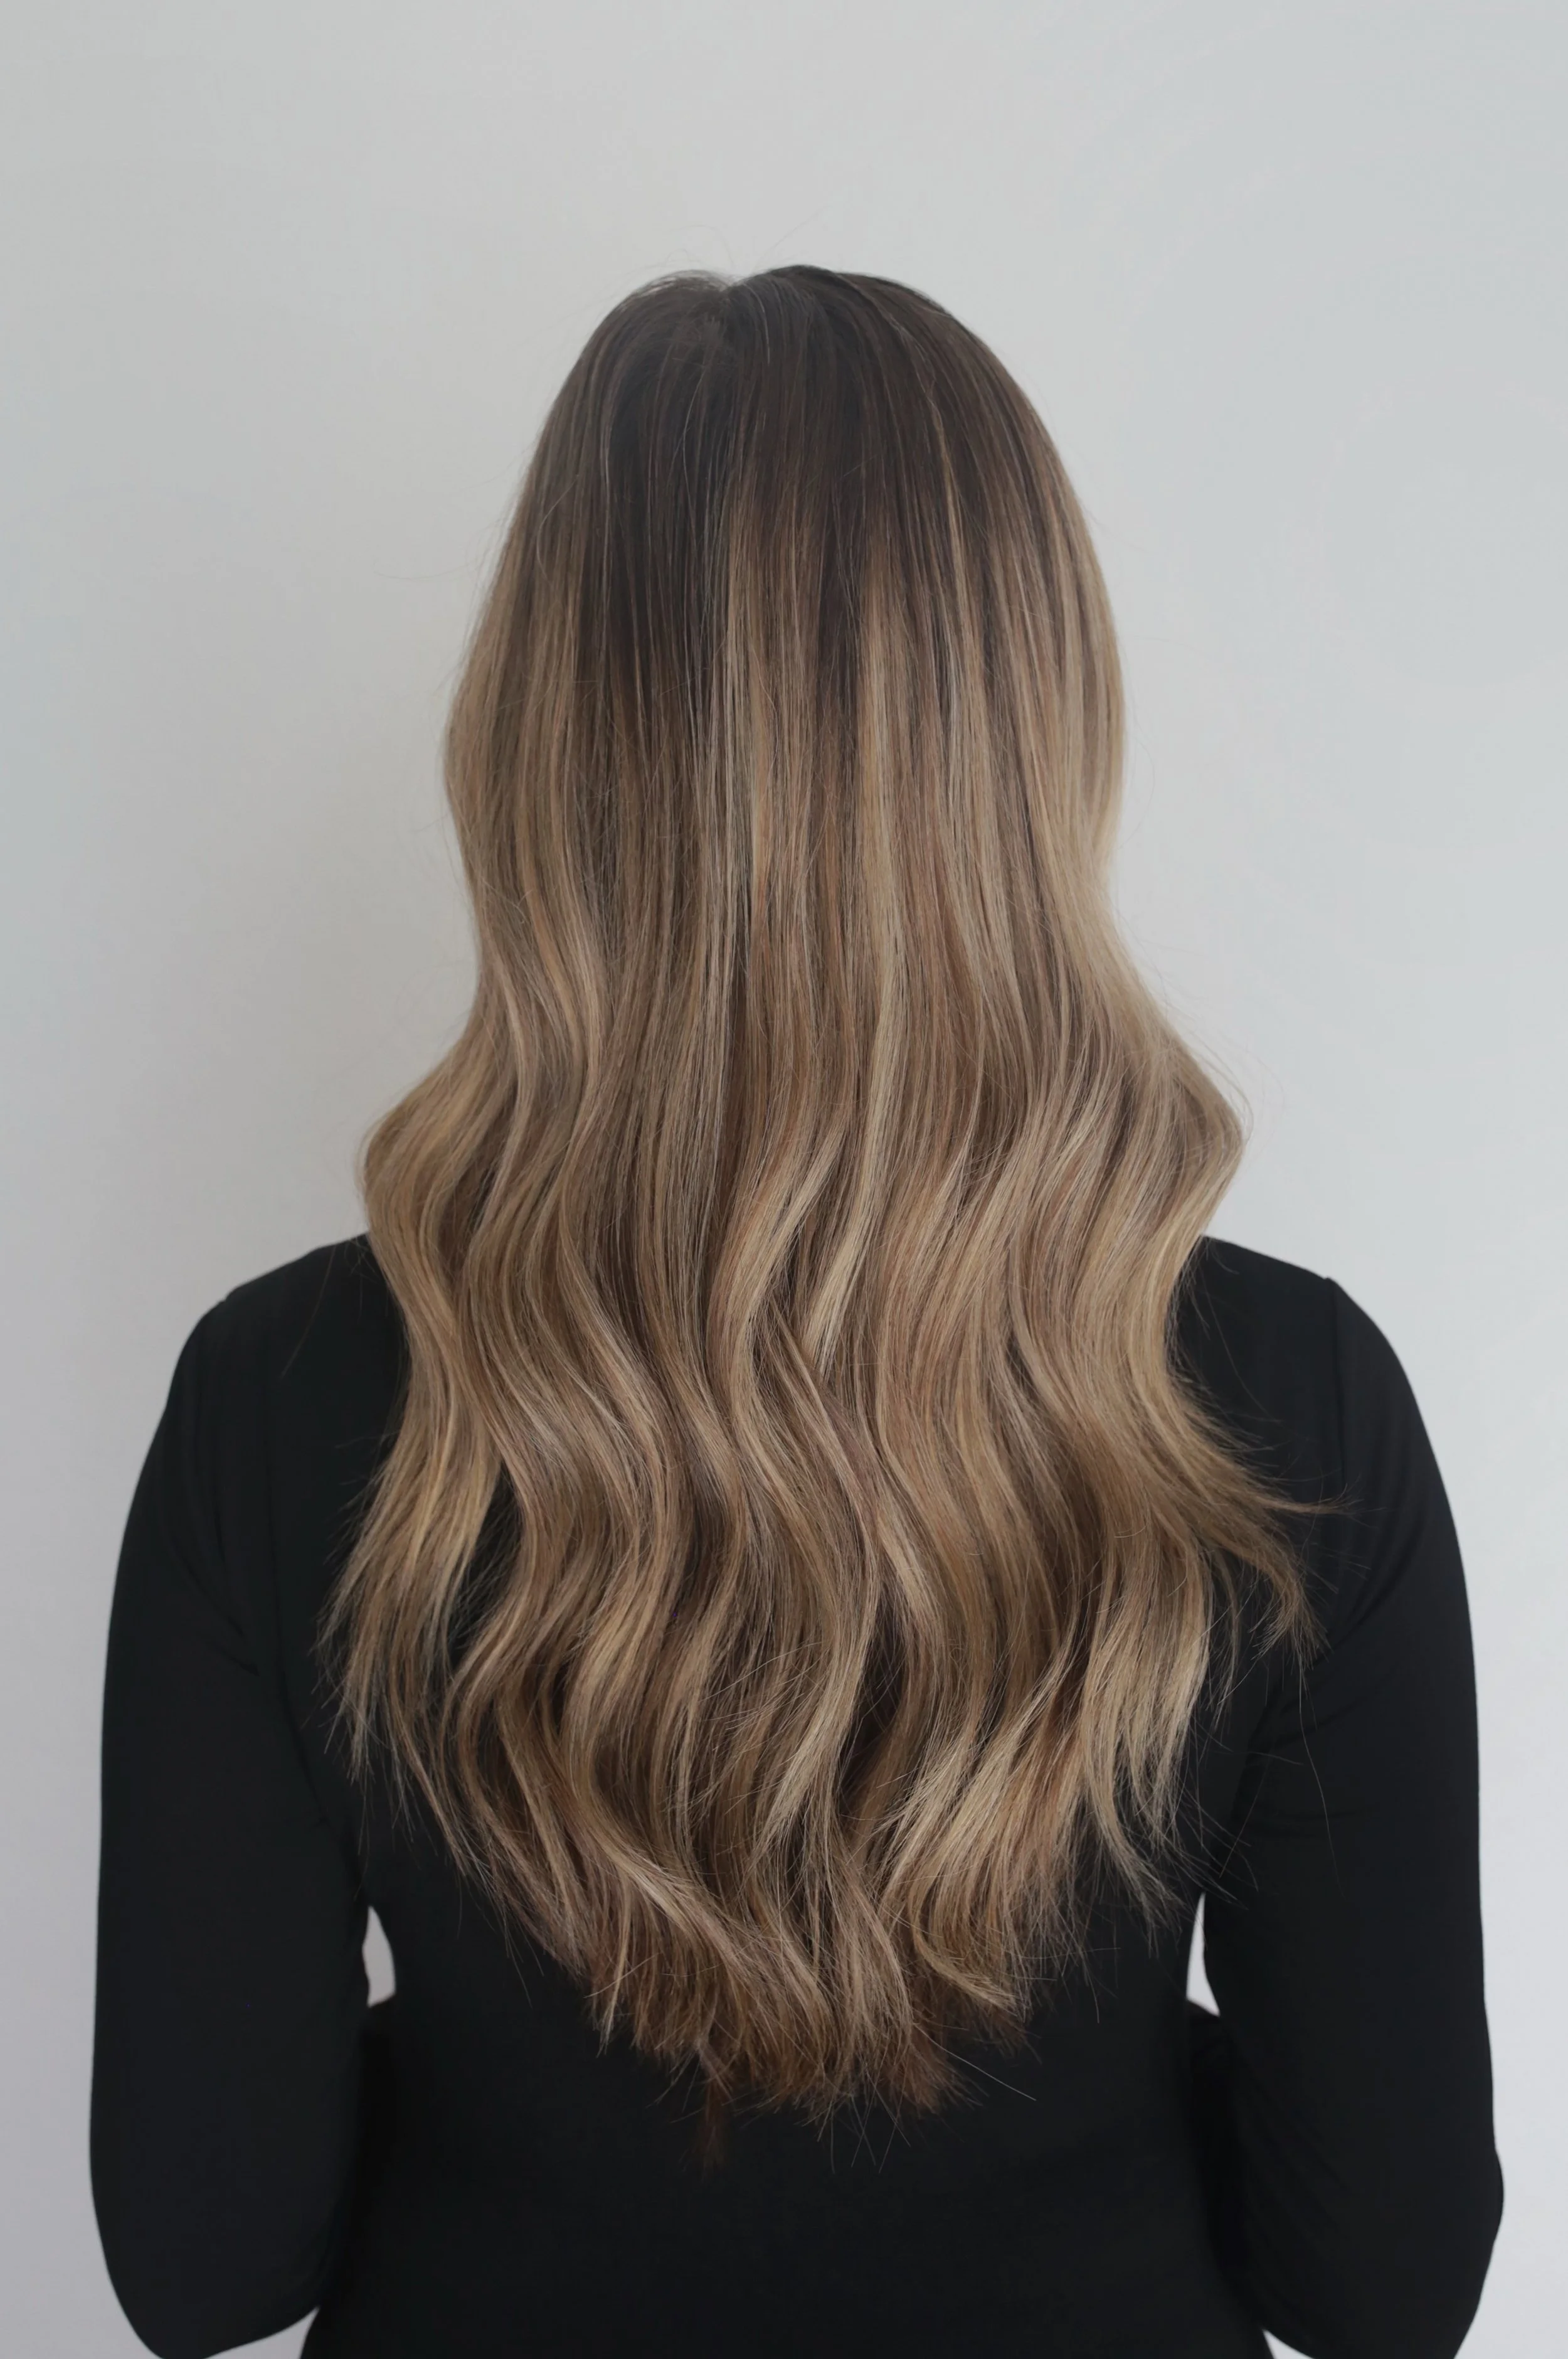
How to Use a Waver on Long Hair

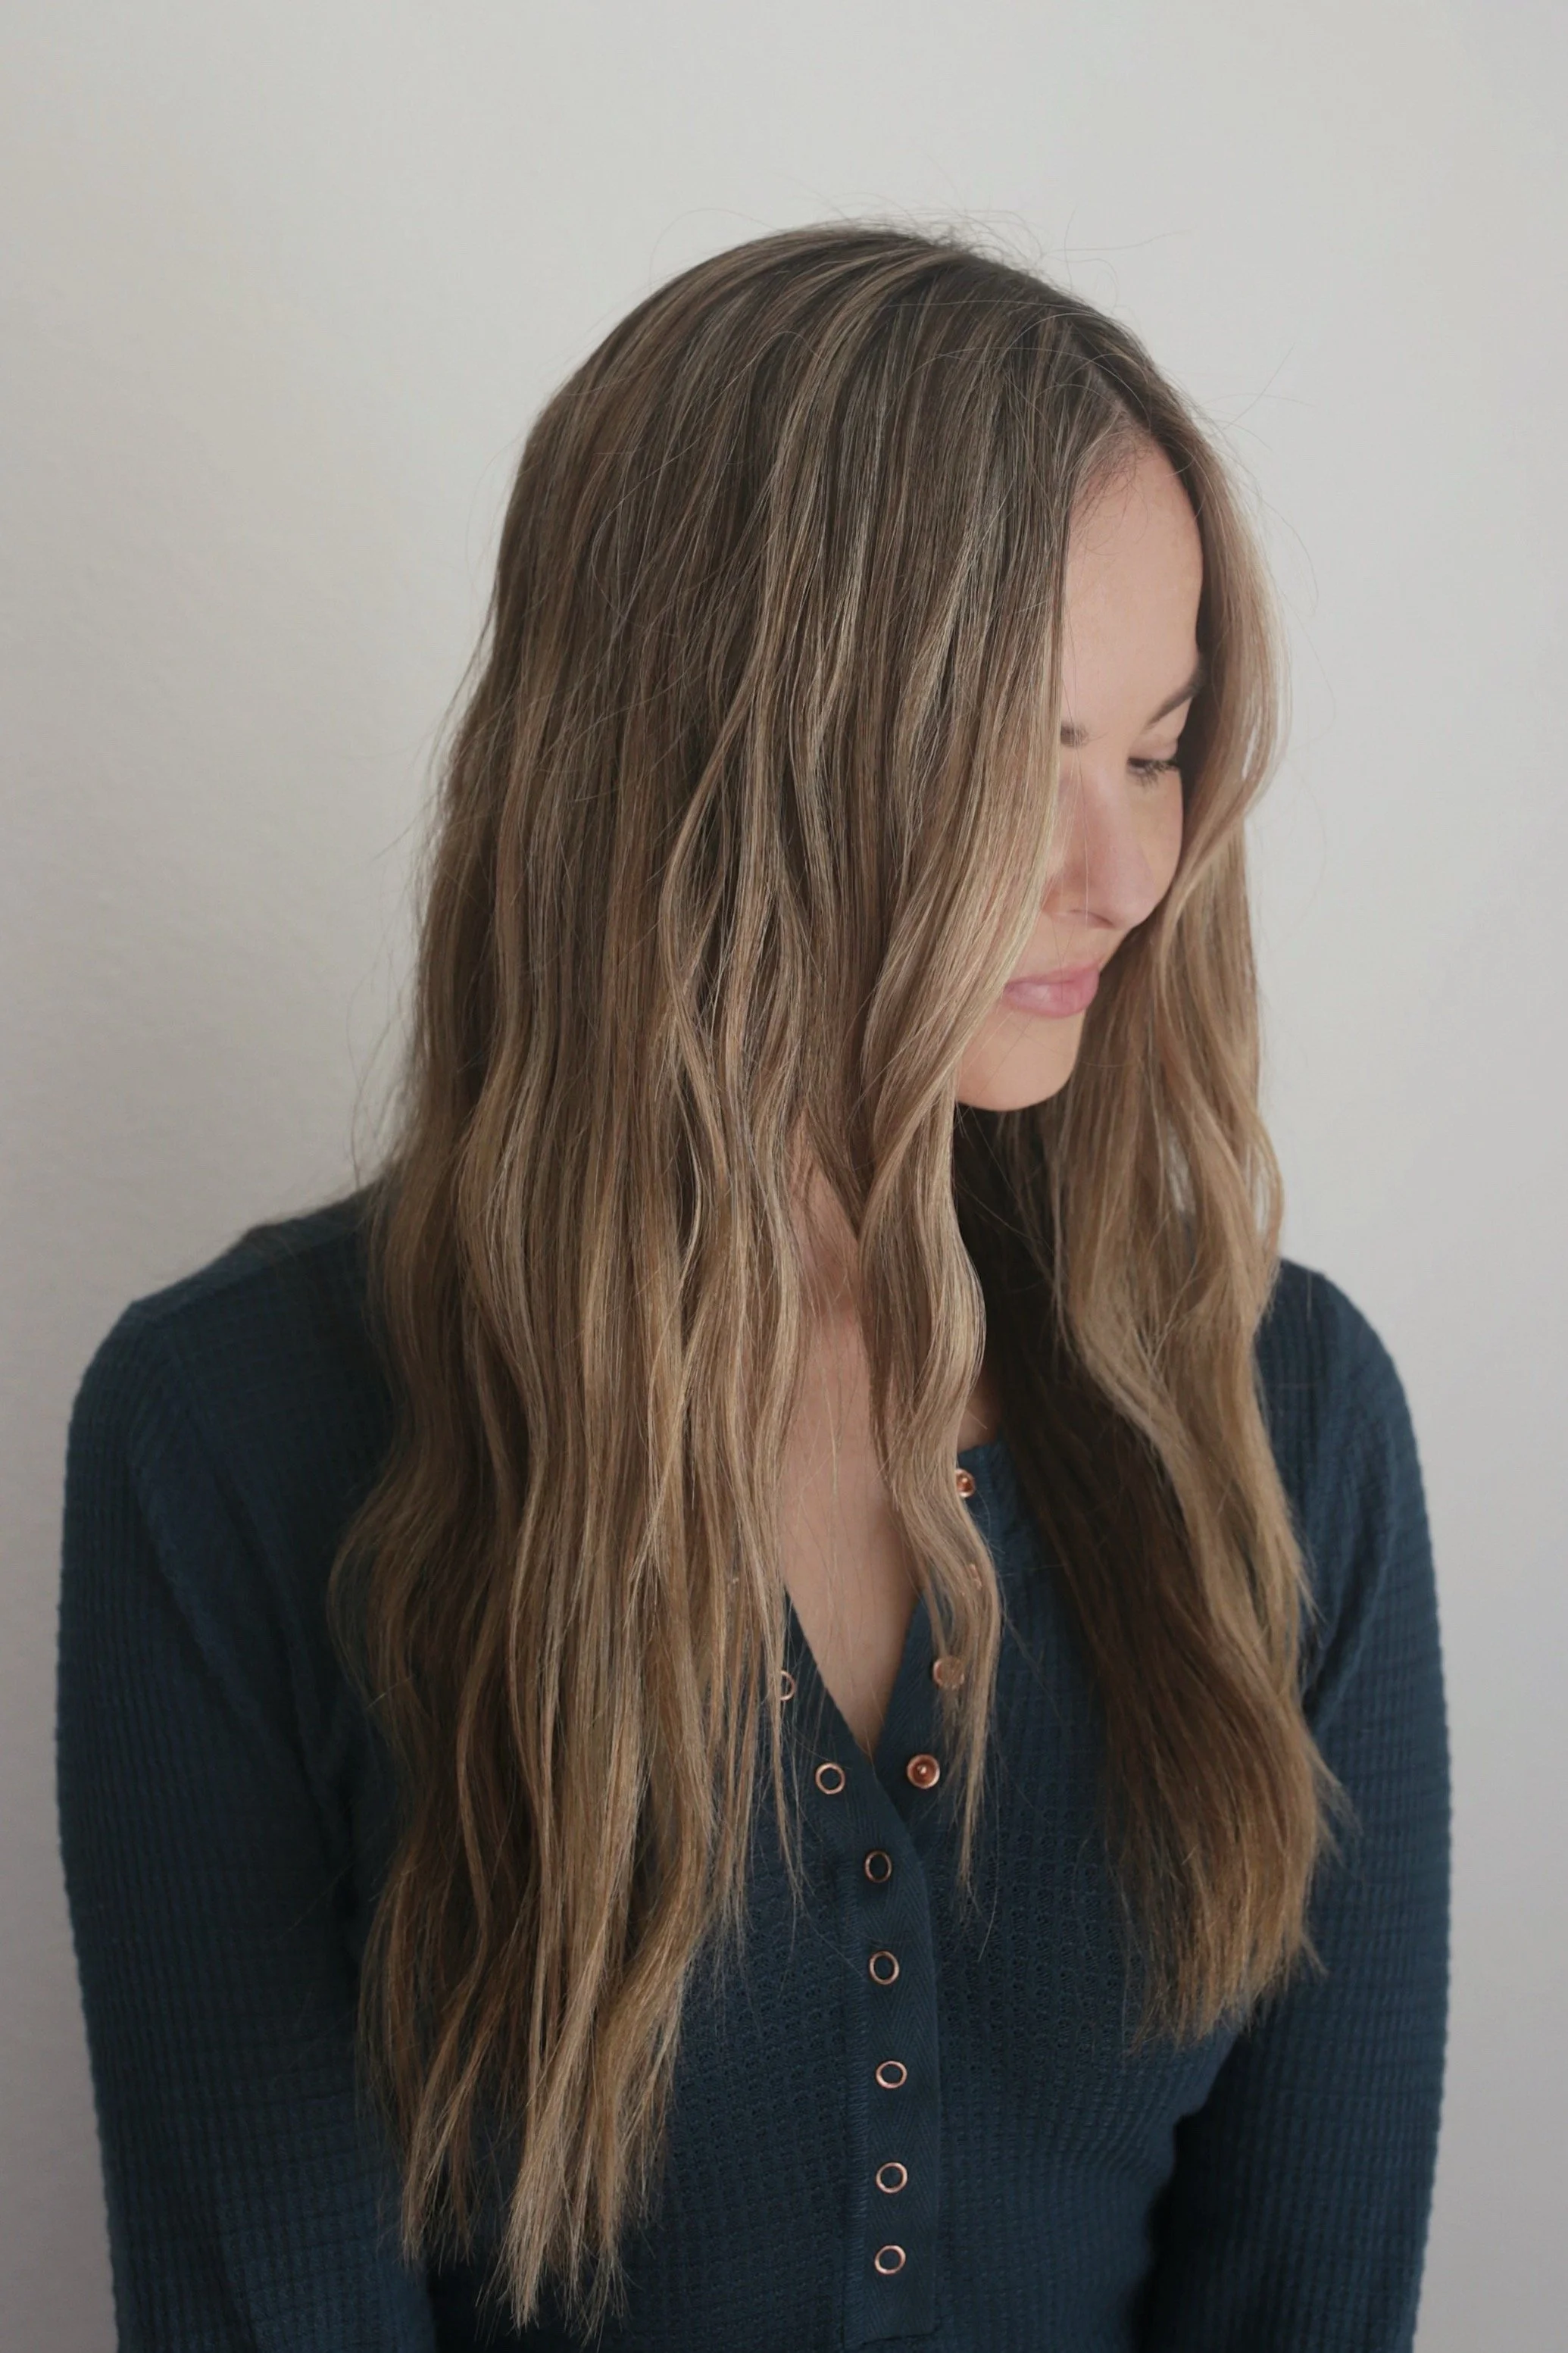
I love the idea of mermaid/ beach waves, but actual wavers have never really worked for me. I always ended up looking like an 80s reject with frizzy, crunchy creases - not the effortless beach waves I’m aiming for. As someone with long, straight hair, it just seemed like wavers were not the right tool for me.
After seeing a resurgence in three-barrel wavers, I was curious to try again, but not too optimistic. My hair stylist also has straight hair, and when I asked her about her beach waves, I was shocked that she used a waver and knew I needed to try again.
It took a few attempts to find a routine that works for my long hair, but below I’m sharing everything you need to know about using a waver to get effortless, mermaid-like beach waves.
how to use a waver on long hair
best waver for long hair
Bed Head Wave Artist Deep Waver: This one gives you a deep wave, so you can work quickly and still get great results. It’s cheap, so you can also test out the waver look without spending a ton.
Mane 1.25" Jumbo Hair Waver System: Another nice option, this one gives you slightly less dramatic waves than the BedHead one. The only downside is it’s a little heavy to hold, but it heats up quickly and is easy to use.
how to use a waver on long hair
A little prep tip if you have straight hair like me: you might want to use a mousse on damp hair to start. I never use mousse when I curl my hair, but I find that this one helps my hair bend with the waver without looking too overdone or crunchy. This mousse doesn’t leave any sticky or crunchy residue, actually feels like nothing in your hair, but helps my hair get (and hold) that beachy look better than when I skip it and go all-natural. Next:
Work in vertical, not horizontal, sections. Typically, when you curl your hair, you section your hair horizontally (from ear to ear), curling the bottom layer, then the middle, and then the top. You don’t want to section your hair like this when you use a waver. Instead, use your finger to separate pieces from your part downwards. Even if you have layers or extra thick hair, trust me. This is what gives you beach waves without making your hair poofy or crimped.
Start at eye level, not at the root. Starting too high can create too much volume. You also want to stagger where you start a little per section so all of your hair doesn’t have the same wave pattern.
Move quickly. Unlike with curling irons, you don’t want to hold the waver to your hair for long at all - maybe 5-10 seconds max. Let your hair warm up; don’t let it get hot. Try to not get caught up in how each individual piece looks, because wavers are really about the big picture instead. Even if a piece looks flat/ straight to you, your hair will overall look more wavy than you think. It’s better to then hold the piece of hair at a bend as it cools to get a little more definition than hold the waver on your hair longer - this is a mistake I used to make, and making the adjustment is the real game-changer.
Use a curling iron for face-framing pieces. For long hair, use a curling iron to curl the front pieces away from your face, and then use the waver at the ends. This will give you the effortless wavy look versus looking like a crimped poodle.
I also like to sometimes curl a few random pieces in the back and finish with the waver to break up the volume a little. With long hair, it’s easy for things to look weighed down or overly done; mixing up your hot tools can make your hair look a little more lived-in and natural.
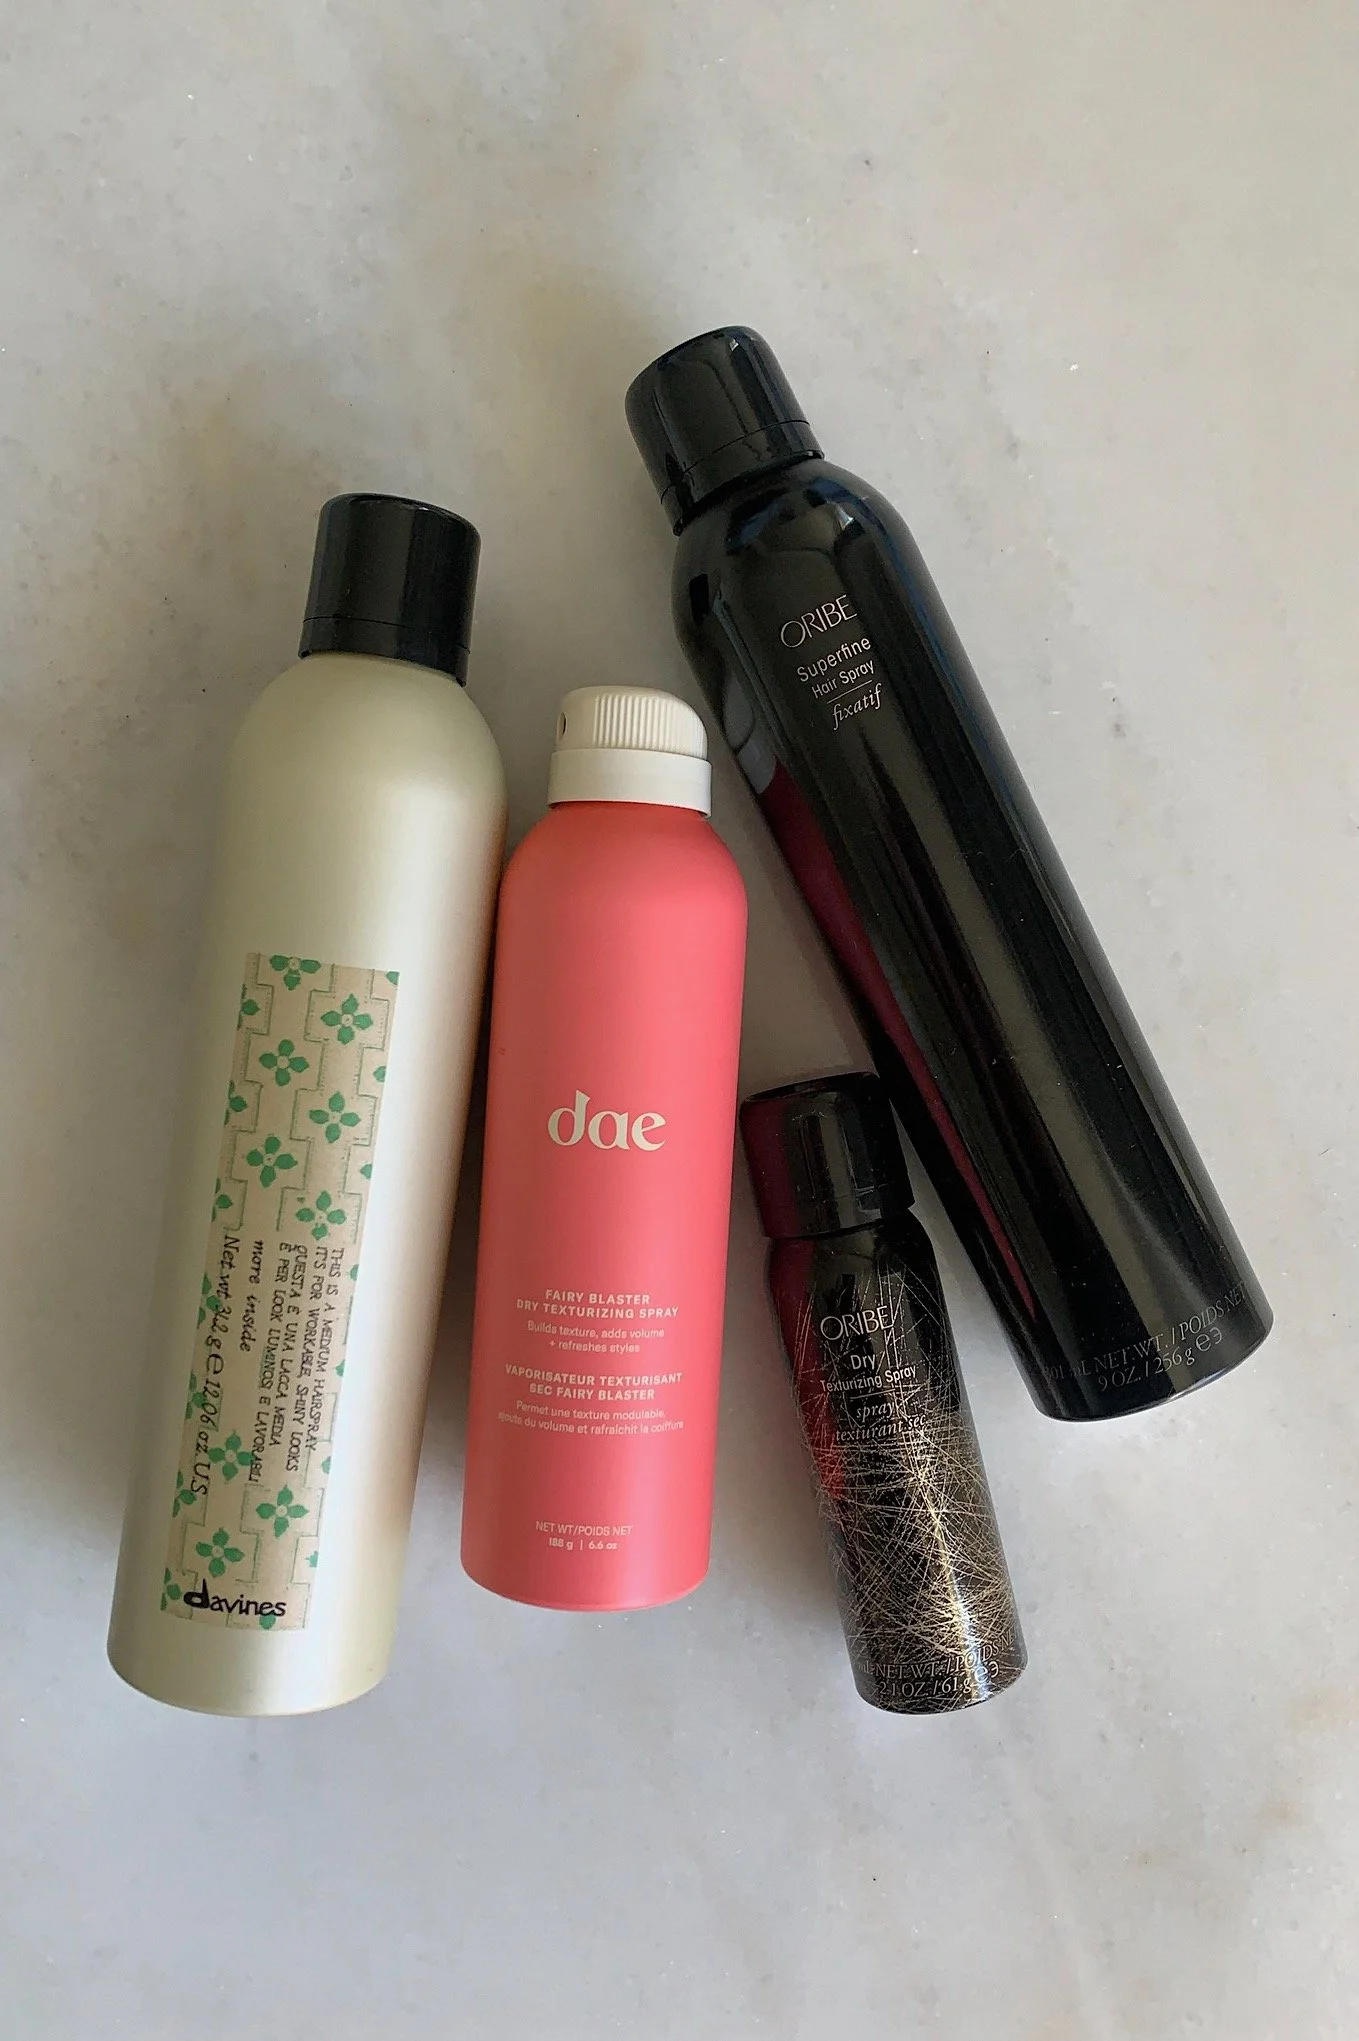
Finish with texturing spray. I never use hair spray with a curling iron, but for the beachy look with a waver, a little texture will make your hair look lived-in versus crimped. My hair stylist uses a medium hold hairspray, but I also really like the Dae Hibiscus Spray because it accentuates the waves without making your hair gritty or sticky.
It may take a few tries, but wavers can work absolute magic on long hair. Let go over perfectionism, work quickly, and know that the more undone your hair is, the better it will look. It takes a little more effort than a traditional curling iron, but overall is a time saver and such a fun look for summer, date nights, girls nights, and weekend errands.