Ninja CREAMi Deluxe 11-in-1 Ice Cream and Frozen Treat Maker Review

I’m typically extremely skeptical of any new trendy kitchen gadget or appliance. They seem cool at first, you use them once or twice, and then they just act as a counter decoration (and reminder that you spent too much money on something you don’t use).
When I saw everyone posting about the Ninja CREAMi Deluxe 11-in-1 Ice Cream and Frozen Treat Maker and their homemade healthy, protein-packed ice cream, I was even more skeptical. I’d rather just have a protein shake or regular dinner, and then enjoy actual ice cream as a treat than settle for some “nice cream” concoction that tastes a little off.
But some of my friends swore the Ninja CREAMis were different, so I decided to save up and buy the machine and see for myself. This review is not sponsored; I purchased everything on my own and did my own testing over the course of a few months. I’ve made normal ice cream, sorbets, and those healthier protein-packed ice creams, too.
Spoiler: The Ninja CREAMi Deluxe 11-in-1 Ice Cream and Frozen Treat Maker is legit, and worth it. Keep reading for my full review, the pros/ cons, explanations of a few of the settings so you can make the most out of the machine, and whether the Deluxe is better than the Ninja Classic and Swirl machines.
Ninja CREAMi Deluxe 11-in-1 Ice Cream and Frozen Treat Maker Review
I didn’t think I would, but I absolutely love the Ninja CREAMi Deluxe 11-in-1 Ice Cream and Frozen Treat Maker. It was definitely pricey, but with pints at the grocery store costing around $10 each now, I consider it worth it and an investment item that I’ll use for years to come. As it stands, I’ve already used it 2-3 times a week over the last year that I’ve had it (more in the summertime, obviously).
It’s a lot more versatile than you think; I personally prefer making protein-based treats, but it also makes the creamiest regular ice cream, and a better sorbet than I can find at any shop around me.
pros and cons of the Ninja CREAMi Deluxe 11-in-1 Ice Cream and Frozen Treat Maker Review
pros
It actually works. It’s trendy, but you don’t have to question if it’s legit or just a money-grab. The Ninja CREAMi actually works; I’ve tried nearly all of the settings. The only one I’ve skipped is the Milkshake setting, because it’s instinctual for me to use my blender. Similarly, while the Smoothie Bowl setting works, I still use my blender instead.
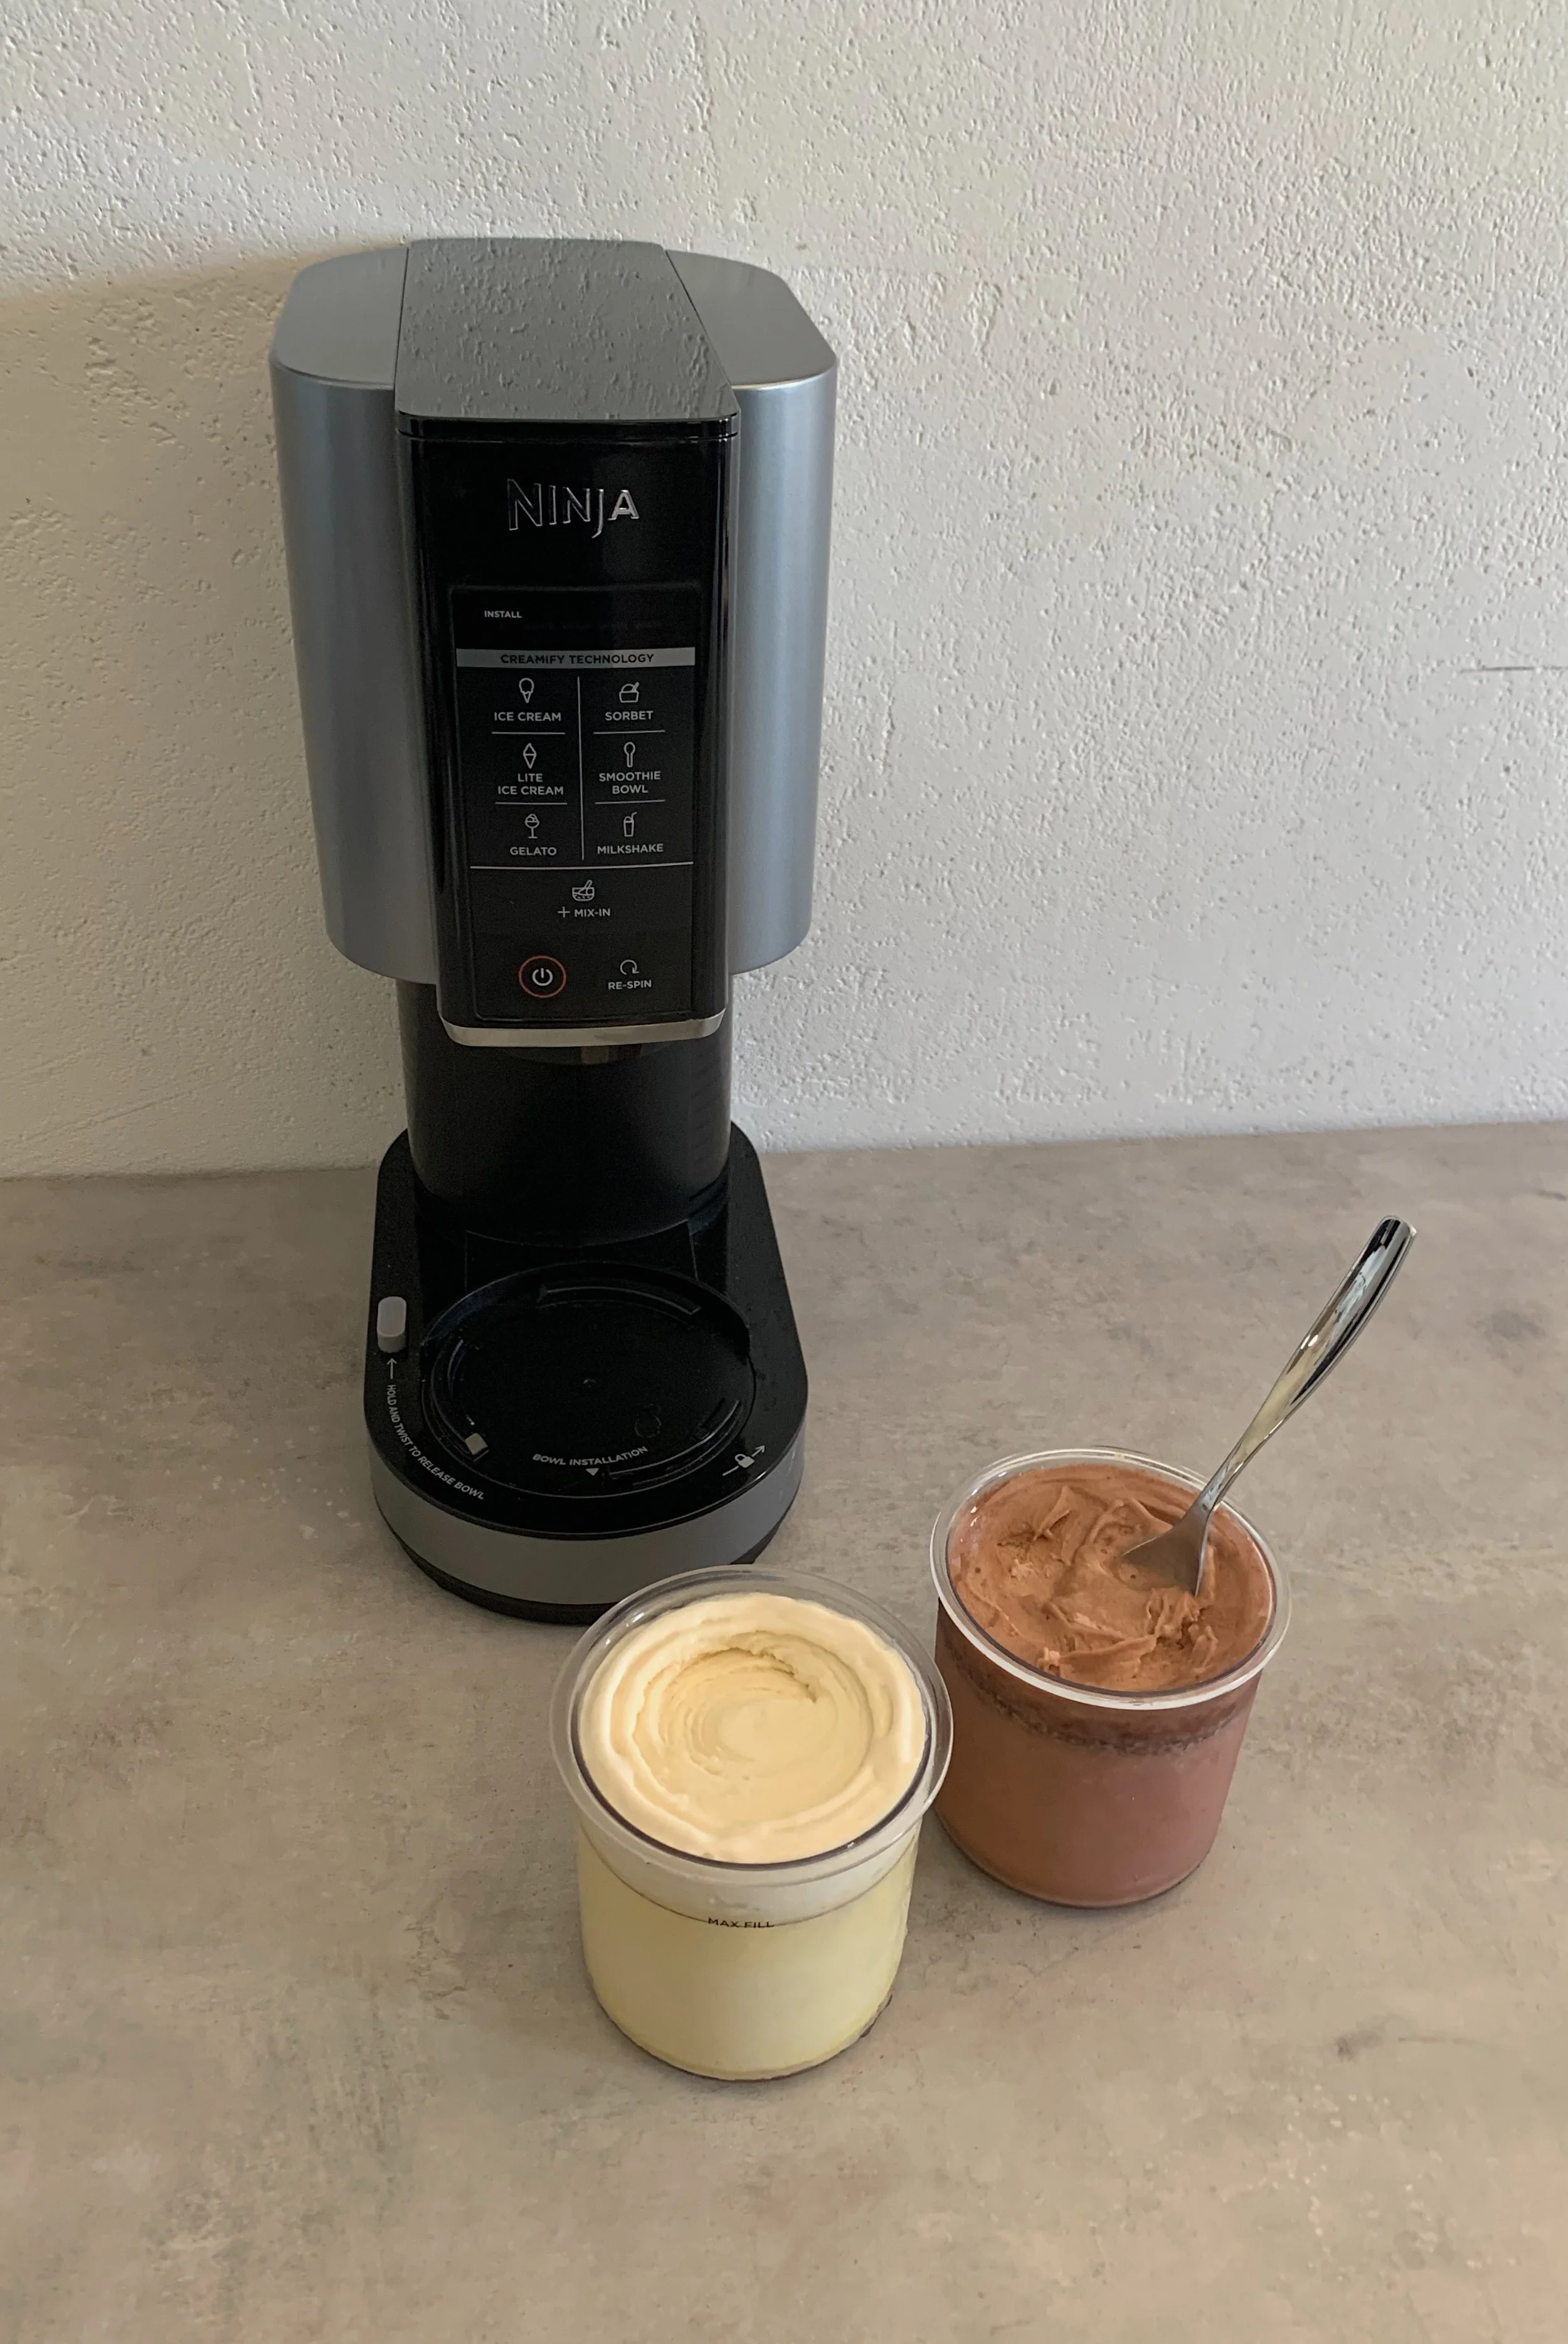
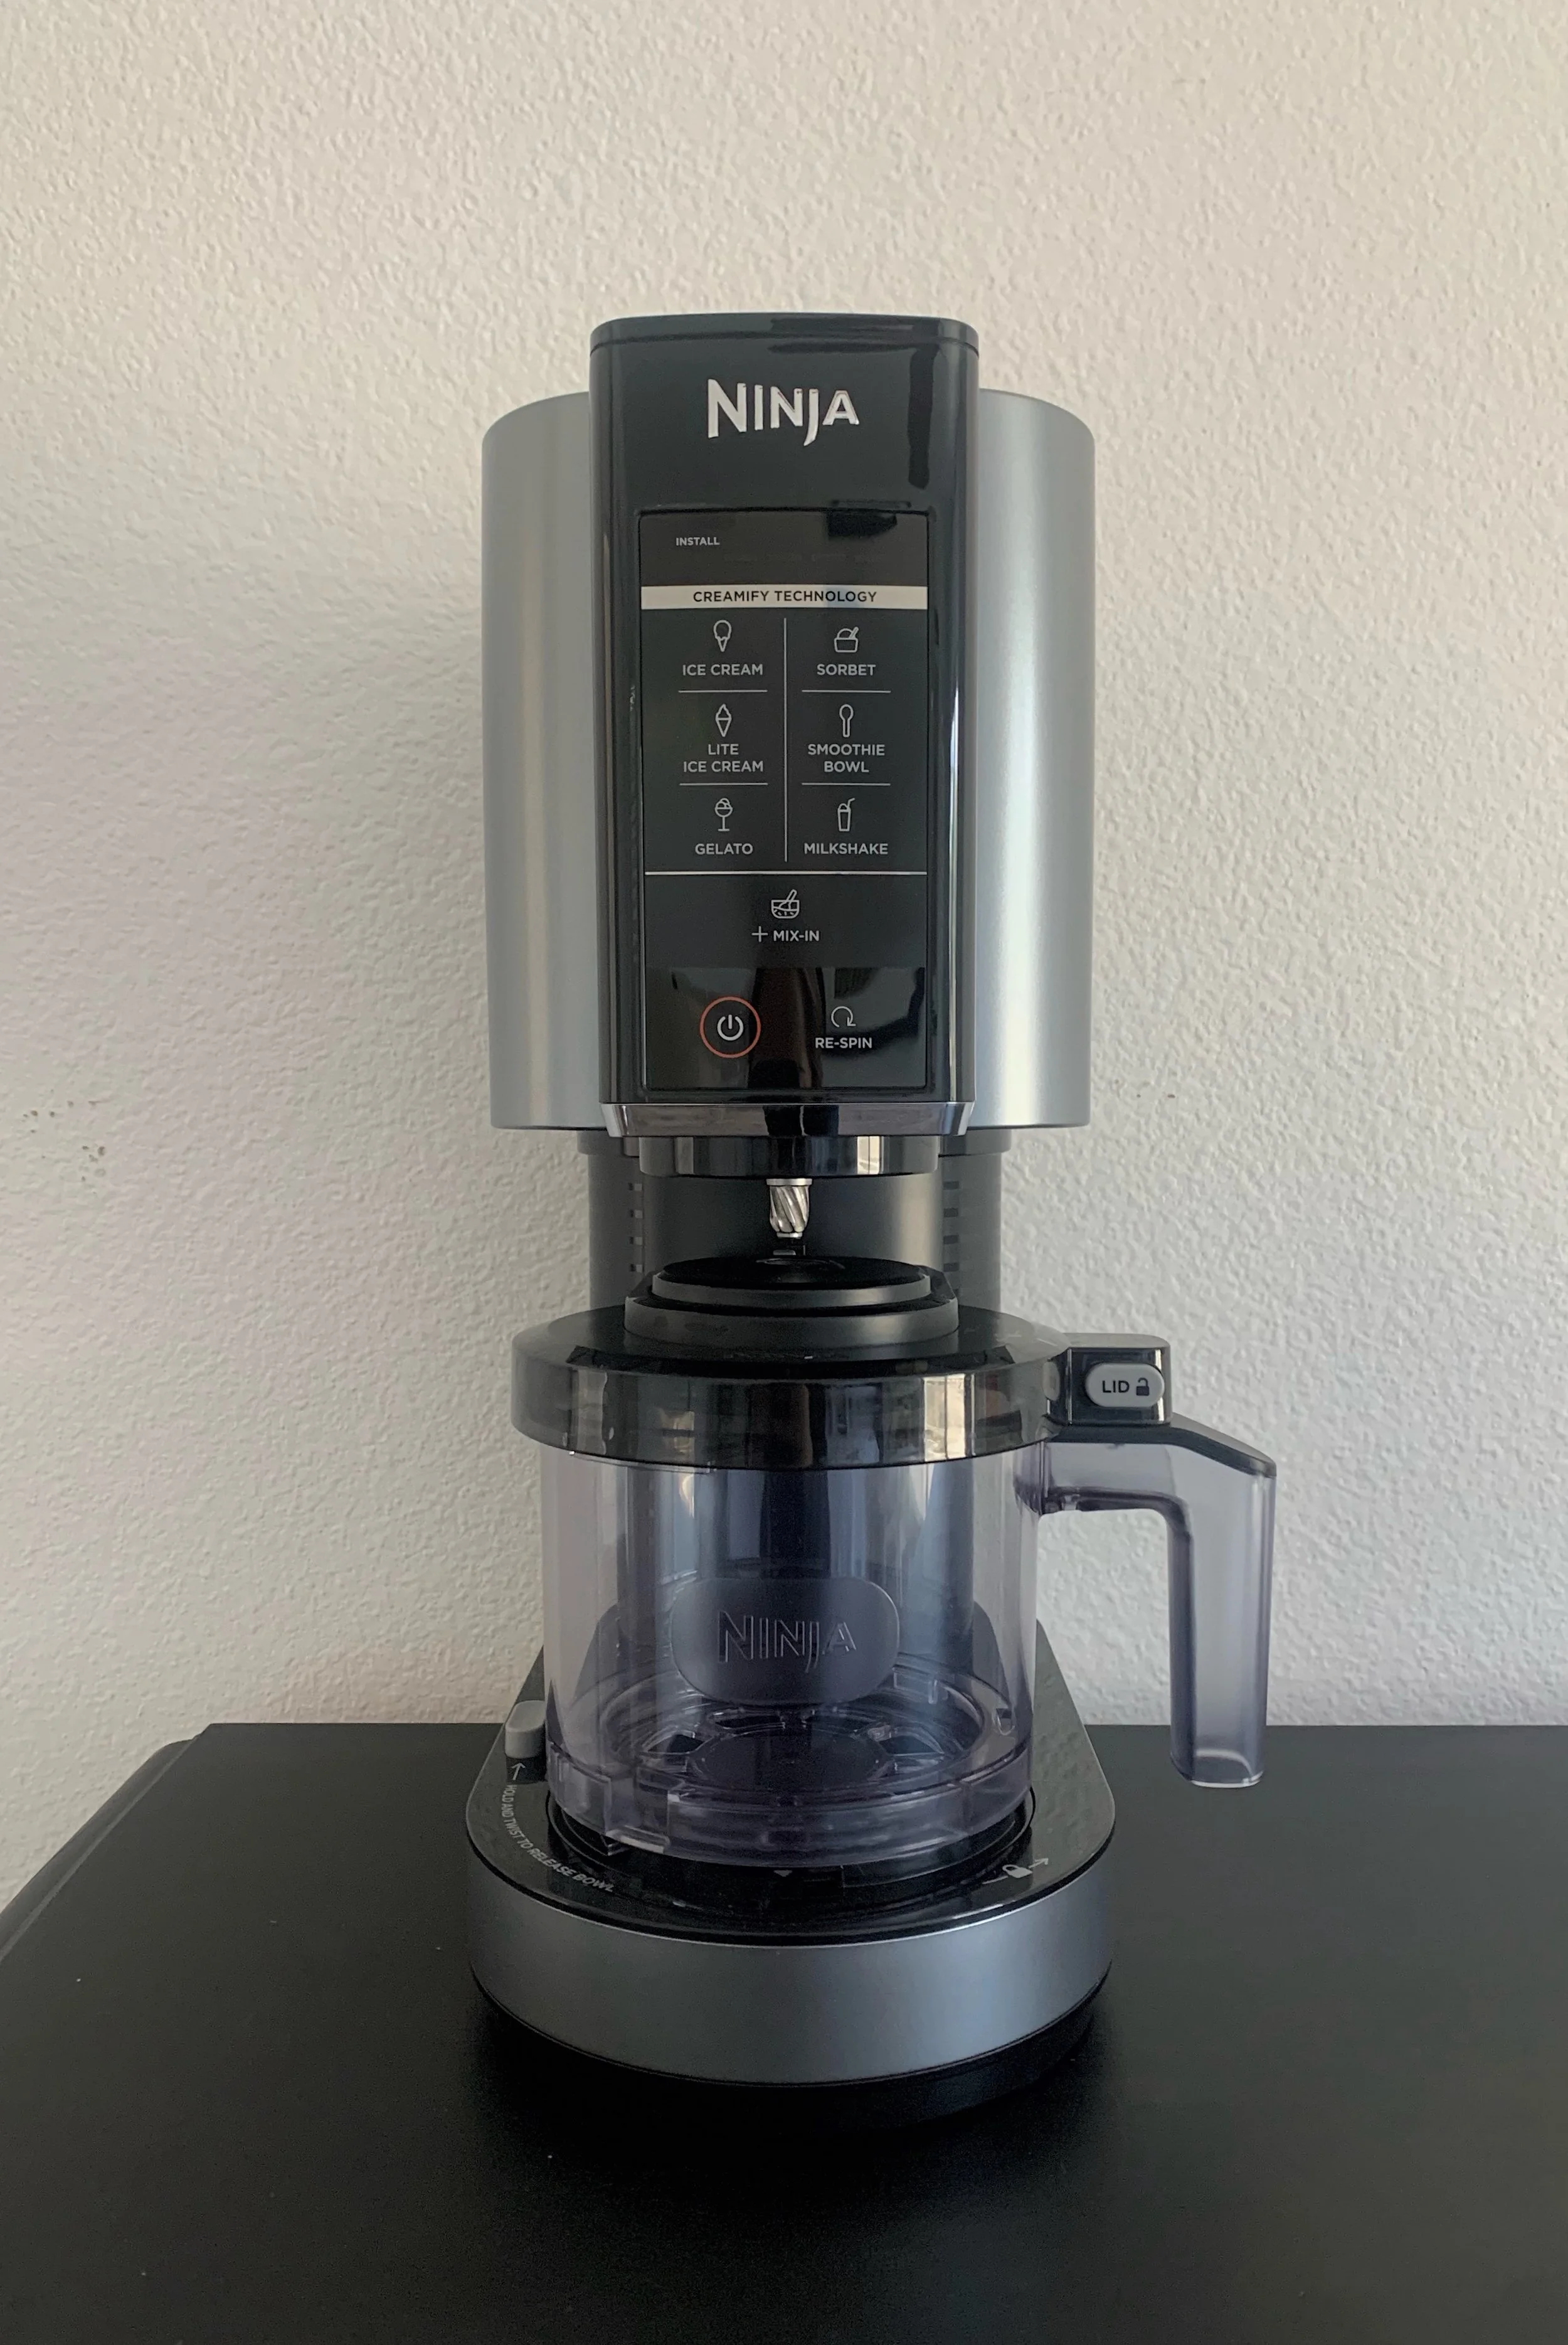
Versatility of what you can make with it. There are six different settings for six different types of treats you can make: Ice Cream, Lite Ice Cream, Gelato, Sorbet, Smoothie Bowl, or Milkshake. You get a lot more versatility than a standard ice cream machine, which makes up for the price a little bit.
Customizable, simple recipes. Unlike traditional ice cream makers, you don’t need to go out and buy lots of special ingredients to make a dessert (no more special grocery store runs for heavy whipping cream). Most of my protein-based ice creams just need milk, protein powder, and pudding mix. The pudding mix might seem random, but the expiration date and pantry storage is much more convenient than heavy whipping cream or egg whites, which I need for my Cuisinart ice cream maker.
Actually works with healthier recipes. A lot of times, you’ll see people share healthier recipe adaptions, and they’re insanely inconvenient and don’t even turn out half the time. I was the biggest skeptic of Ninja CREAMi protein ice cream and highly doubted it would taste good, let alone as good as ice cream. That being said, I was pleasantly surprised (some of my recipes are linked below). Similarly, the sorbet is actually sorbet and you’ll get a great consistency right away; it’s a fail-proof setting, in my opinion.
Makes ice cream quickly. The machine runs for just a few minutes, whereas traditional ice cream makers usually need at least an hour. You do have to plan ahead and keep your pint in the freezer for at least 8 hours (24 hours is ideal), but once your pint is frozen, you’ll have ice cream ready within 5 minutes. I make a few pints every Sunday night so they’re ready during the week, and it’s so nice to be able to make a quick after-dinner snack without having to wait hours for it to be ready.
Extremely easy to use. There is a learning curve (more on that below, plus tips to streamline the process), but once you know, it’s easy and only requires you to press a button or two. The machine is intuitive to use; you don’t have to read the manual or learn a bunch of steps or figure out what all the random parts are. I am extremely stubborn and hate to read a manual or watch a tutorial video; I did for the sake of learning the machine inside and out to write the review, but I actually tested the machine a few times before reading about it and things were fine.
Easy to clean. Love how easy this machine is to clean, thank goodness. It’s honestly easier to clean than a blender, and I love that the machine itself stays clean (just the pint and lid get dirty), so you don’t end up with a bunch of dishes to do.
Smaller portions. This can be a pro or a con depending on how you view it; I see it as a pro because it’s just enough for me when I’m hungry, or me plus a friend when I feel nice and willing to sharing (rare, kidding). The Ninja makes one pint at a time, so I think it’s the perfect amount for 1-2 people. If you have kids/ family members that all want different flavors, you’ll love this much more than a traditional ice cream maker because you can all have different flavors in a matter of minutes.
cons
Price. Let’s be real, anything over $100 is expensive to me, and when something seems gimmicky, I am even more skeptical of the price. $279 for an ice cream maker (literally just for treats!) is very expensive and obviously not a spontaneous purchase. That being said, it’s worth it. I do think I’ve saved money in the long run when I compare the price of this machine plus ingredients versus pints from the grocery store and trips to the ice cream shop. If you want healthier desserts or have kids/ family members with different favorite flavors, the Ninja is worth the price.
It’s loud. I was surprised by how loud it is. I’ve literally placed it in different rooms to see if it was my house/ the echo, but it is quite loud. Not so loud that you’ll get in trouble, but if you live in an apartment with thin walls, you might want to be conscientious of when you use it (ex: not at 3am). However, the machine works quickly so you only have to deal with the noise for a few minutes.
There’s a learning curve. I know I said it’s easy to use, but it does take a few attempts to get the hang of it (like scraping the sides before a re-spin). If you follow my tips below, you’ll skip the trial-and-error I went through and it’ll be super easy for you.
You have to plan ahead. Ideally, you want to freeze the pint for 24 hours (8 at a minimum) ahead of time. I recommend buying a few extra pint containers and batching a few recipes once a week (I do this on Sunday mornings, because one will then be ready that afternoon). It makes the process even more convenient.
It’s a tall machine. If you want to store your machine rather than leave it on the counter, it may not fit in standard cabinets as it’s around 17” tall. It’s also a little heavy, but not unbearably so (I think the height of the machine plays more of a role in it feeling awkward to move around, to be honest).
Some settings spill. I have not experienced this, but I have heard that some people experience spills when making slushes or drinks. For easy treats like that, I just use a blender instead, so I don’t have much experience with it.
how to use the ninja creami
These are more tips and tricks to help you avoid the learning curve; for step-by-step instructions, I would refer to the manual.
Make your base and make sure to freeze it for at least 8 hours; 24 hours is ideal.
As you make your base, don’t go over the fill line. No matter what you’re making, this will help you avoid spills, damage to the machine, and will give you the best results.
Freeze your pints flat and level. Again, even if your volume is below the fill-line, you don’t want to freeze the pint on its side or lopsided. It will affect the machine’s ability to work.
If you’re making a healthier protein ice cream, use Fairlife milk, not regular milk! This will give you creamy ice cream; it works better than dairy milk or dairy-free alternatives. I’ve used both the 2% and fat-free versions and both work equally as good.
Two more benefits to using Fairlife: it’s lactose-free and lasts longer than regular dairy milk.
When you take the pint out of the freezer, you might want to run it under warm to hot water for around 30 seconds. Depending on what you’re making (mostly ice cream and protein ice cream), you’ll have to scrape the sides down and re-spin to avoid icy edges. Running the pint under warm water before you spin makes this much easier! If you hear a crack, it’s not damage to the pint; it’s just the components separating from the sides.
If the pint has been in the freezer for a while (a week or so), I will run it under warm water until I hear two cracks and then specifically use a butter knife to scrape the sides as the longer protein ice creams are the freezer, the icier they tend to be.
You can also leave it out on the counter for 5-10 minutes before spinning; I sometimes do this if I’m not in a rush, but the warm water trick works well.
After your first spin, the ice cream might look crumbly (like fake powder snow). You didn’t do anything wrong; just scrape the sides down, add a splash or two of milk, and re-spin it. You can use a normal spoon to scrape the sides, but some people prefer to use a butter knife or plastic scraper.
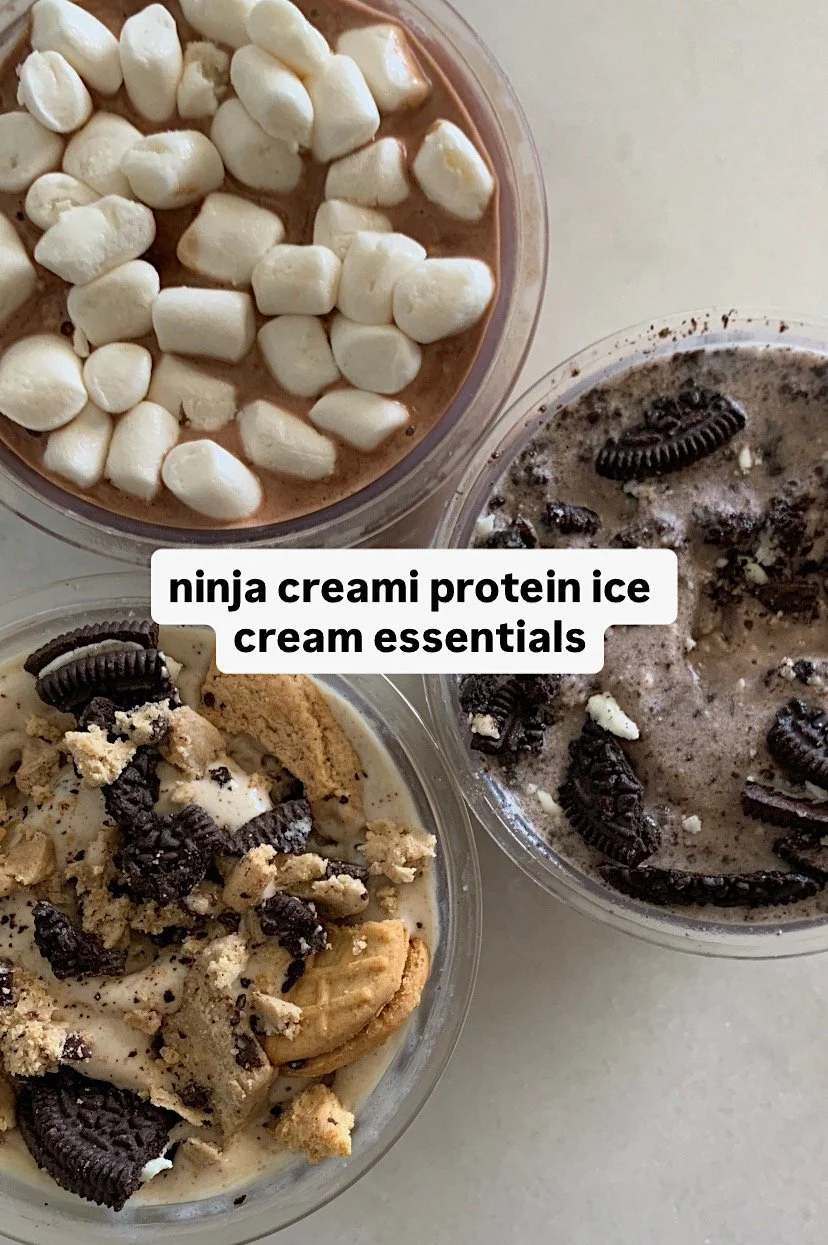
You can use up to 1/4 cup of mix-ins. For most even distribution, make sure there’s a hole in the center of your CREAMi after the first spin (I widen the hole the machine already makes a little), and add your mix-ins there. Never use more than 1/4 cup per Ninja instructions.
ice cream vs lite ice cream
I get a lot of questions about this, and it confused me when I first got my Ninja. Essentially, use the Ice Cream setting for traditional recipes that have fuller-fat ingredients. The Lite Ice Cream setting is specifically intended for low-fat, low-sugar (or sugar-free) recipes. These tend to freeze harder, so that setting will help give you the truest, creamiest ice-cream like result. I use Lite Ice Cream for all of my protein ice cream blends.
re-spin vs mix-in
Re-spin will process your ice cream again; use it when the consistency after your first spin is powdery. The mix-in setting is meant to fold in your additional ingredients, distributing them evenly throughout the pint.
One note: never select re-spin after you add mix-ins; this can damage the machine.
That being said, as far as re-spin vs mix-in goes, it’s kind of up to personal preference and what consistency you like. You may notice that if you re-spin too many times, your ice cream gets too creamy, almost to the point of being melted.
I’ve tried mix-in (instead of re-spin) after the first spin and find that the result is too icy for my liking, but I’ve also found that my ice cream is too melted if I re-spin twice, so I’ll typically re-spin then do mix-in if I need a 3rd spin.
If you are worried about the ice cream being too melted using both a re-spin and mix-in, I recommend:
Place your mix-in toppings in the fridge; I personally will chop up larger ingredients like cookies/ pretzels, but other people don’t.
Spin the CREAMi once.
Scrape sides, add a few splashes of milk if desired, then re-spin.
Make sure the hole in the center of the CREAMi is big enough for your mix-ins, then place your CREAMi in the freezer for 2ish minutes.
Take the CREAMi out of the freezer and the mix-ins out of the fridge, add them to the center of the CREAMi, then use the mix-in setting.
A few of my favorite mix-ins:
Cookies - Oreos, Nutter Butters, Chips Ahoy, etc.
Mini chocolate chips
Cereal pieces
M&Ms
Granola or nuts
Dried fruit
Pretzels
Peanut butter
Graham crackers or Teddy Grahams
Waffle cone
Mini marshmallows
Fruit (if frozen - try to thaw a little before mixing, or freeze in smaller pieces)
Protein bar pieces (Barbells taste just like candy bars, honestly)

is the Ninja CREAMi Deluxe 11-in-1 Ice Cream and Frozen Treat Maker Review worth it?
Overall, I really love the Ninja CREAMi Deluxe 11-in-1 Ice Cream and Frozen Treat Maker! My typical rule of thumb is “no new kitchen gadgets or appliances” but this one is absolutely worth the price and space (even if you have a tiny kitchen). I highly recommend it if you’re an ice cream, sorbet, or sweet treat lover (especially if you love to make your own or want a healthier version).
Ninja CREAMi deluxe vs regular
While the regular Ninja Creami machine is cheaper, there are a few key differences that may make the Deluxe the better option in the long run:
Larger containers (24oz vs 16oz)
More settings (11 vs 7). Those extra 4 settings are: Frozen Yogurt, Italian Ice, Slushi, Frozen Drink, and Creamiccino (frozen coffee drink)
The Deluxe lets you process half a pint, leaving the rest frozen for later.
I’ve seen mixed reviews on which machine is quieter; either way, they’re definitely a little louder than expected.
Ninja CREAMi deluxe vs swirl
The Ninja Swirl is getting a lot of attention lately, particularly because it has a soft-serve function (unlike the Ninja Deluxe). A few other differentiators and similarities:
The Ninja Swirl is more expensive (around $350)
Both still require freezing ahead of time.
Both are still bigger kitchen appliances, but the Swirl is bigger and bulkier.
The Swirl pints are smaller at 16oz; Ninja Deluxe pints are 24oz.
ninja CREAMi deluxe vs ice cream maker
The Ninja is more expensive, but you get more versatility out of it (gelato, lite ice cream, sorbet, etc.). A few other key differences:
The Ninja makes pint-sized servings, which is great if you don’t want to commit to a flavor. Traditional ice cream makers typically make larger servings of single flavors.
Both allow for mix-in toppings.
I can’t speak for all traditional ice cream makers, but the Ninja is louder than my Cuisinart 2 Quart Frozen Yogurt-Sorbet & Ice Cream Maker. I can run my Cuisinart while the other people in my house are sleeping; I would not run the Ninja.
The Ninja works better on adapted (healthier, low-fat or low-sugar) recipes than my Cuisinart, too.
You have to freeze the Ninja pints for at least 8 hours (ideally 24) before making your ice cream, but the ice cream is then ready in just a few minutes. My traditional ice cream maker typically runs for a few hours, but you don’t have to freeze it in advance (I just keep the container in the freezer all the time so it’s ready).
As far as size goes, the Ninja is taller than my Cuisinart, but both aren’t necessarily large kitchen appliances. They’re more compact, lighter, and easier to store than my KitchenAid Stand Mixer, for example.
Overall, for daily use, I prefer the Ninja Deluxe. If I want homemade ice cream for a large group (like a kids’ party), a traditional ice cream maker would be a lot easier and more convenient.
ninja CREAMi deluxe vs a blender
I’ve never used my blender to make ice cream, but I do still prefer my blender for milkshakes, smoothies, and smoothie bowls (even though the Ninja has these settings and capabilities). It’s just what I’m used to, but I still think the Ninja is worth buying for the ice cream, sorbet, and gelato options.
The Ninja is launder and more expensive, but easier to clean and specifically designed to make frozen desserts from pre-frozen ingredients.
where to buy
You can find the Ninja CREAMi at Amazon and Crate & Barrel, or retailers like Target and Macy’s. I highly recommend buying a few extra pint containers so that you can bulk-batch and make a few at once. They do need to freeze for at least 8 hours (24 hours leads to the best results) before you “spin” them, so I like to make 2-4 at a time and have them in my freezer to use throughout the week.
For some of my favorite Ninja CREAMi protein ice cream recipes, see below.